If you are a Docker professional, you might have surely heard about Dockerhub. Dockerhub is the official Docker registry which contains tons of prebuilt Docker images readily available for you to download. It is free, publicly available, and contains thousands of useful images such as Nginx, MySQL, Ubuntu, Centos, Fedora, NodeJs, MongoDB, Apache, etc. Get a brief knowledge about How to create a private registry for Docker with this tutorial. You can use it to pull the base images from it and create your own customized images. Dockerhub contains official images provided by Docker as well as some vendor-specific images. Also, you can create your own repository there and push your own customized images which will allow you to create backups of your images as well as share them with others. Like Dockerhub, there are several other Docker registries as well.
How to create a private registry for Docker?
But if you don’t want to push your images to any publicly available registry, you can create your own private repository as well. This will stay within the bounds of your host machine and only you will have access to it. You can do this by pulling an image called “registry” from Dockerhub and then create an instance of it on your machine. You can then tag your images to localhost:5000 and once you execute the push command on it, instead of getting stored in your Dockerhub repository , it will get stored in your localhost repository that resides in the container that is associated with the registry image and is actively running. Please note that the registry container should be actively running in order for you to store your images there. Also, you need to tag the image with localhost:5000 before you can push it. Moreover, to save the changes, you need to keep committing the changes in the container. Let’s use the Docker run command to download the registry image from Dockerhub and then, create a container called registry.
$ docker run -d -p 5000:5000 --name registry registry:latest
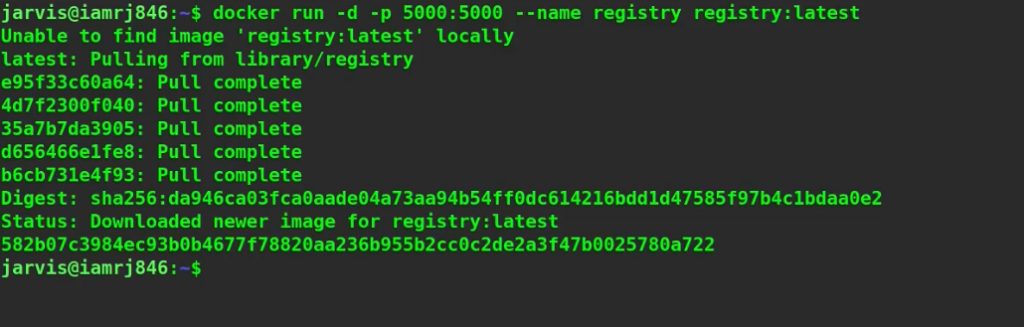
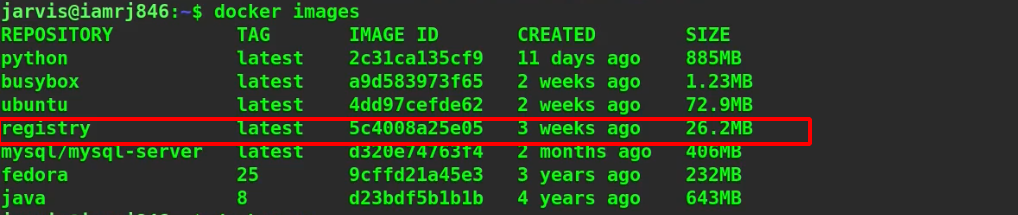
Here, we have used the -d option to run the registry container which acts as the private repository in detached mode. The -p option is used to publish the ports and connect port 5000 of the localhost with port 5000 of the container. The name of our repository will be localhost:5000. Let’s list all the images to verify whether the image has been downloaded or not.
$ docker images
Next. let’s print a list of all the active containers.
$ docker ps

You can see that we can now interact with the container at localhost port 5000. Now let’s tag one of our existing images so that we can push it to our local repository. In our example, we will tag an ubuntu image that is available locally so that we can push it to our private repository (At localhost:5000 inside the registry container).
$ docker tag ubuntu:latest localhost:5000/ubuntu
Here, we have tagged the latest ubuntu image to the localhost:5000 tag. So the final image will be localhost:5000/ubuntu where localhost:5000 is the repository name and ubuntu is the image name.
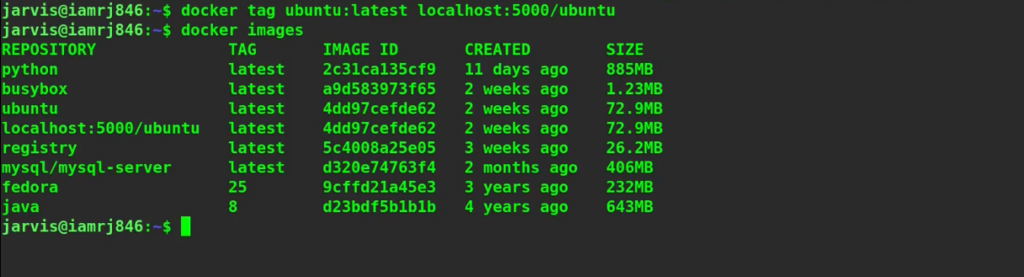
You can see that our new image has been tagged. Now let’s use the Docker push command to push the repository to our private registry.
$ docker push localhost:5000/ubuntu

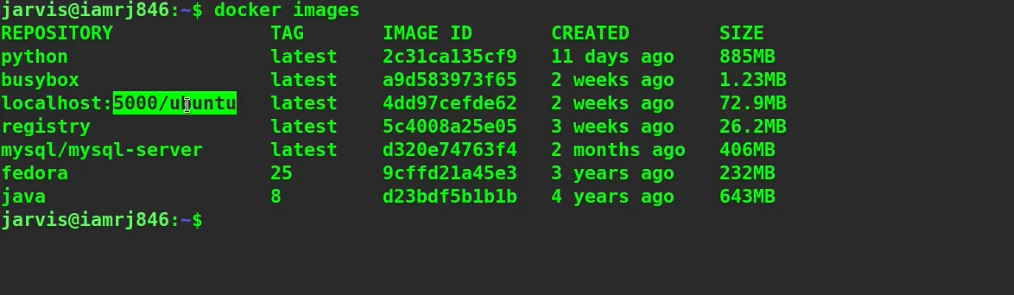
Let’s list all the Docker images once.
$ docker images

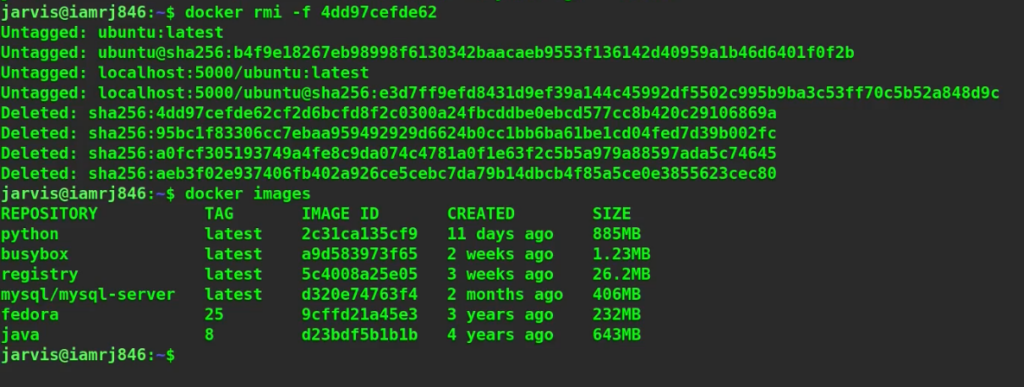
Here, we have our old ubuntu image with the latest tag as well as the newly tagged image that we have created. Let’s delete both these images so that we don’t have any ubuntu images on our local machine. We are doing this so that later we can download the ubuntu image from our own local private repository and verify whether our repository actually works or not.
$ docker rmi ubuntu:latest
$ docker rmi localhost:5000/ubuntu
$ docker images
Now, let’s try to pull the ubuntu image from our local repository.
$ docker pull localhost:5000/ubuntu
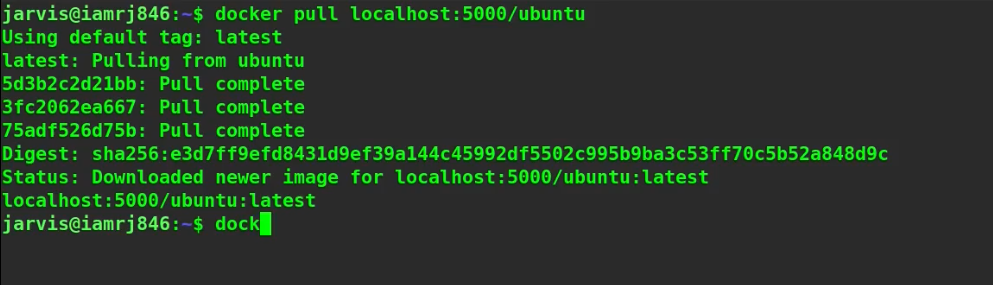
Let’s list all the images to verify the download.
$ docker images
You can see that our image has been pulled successfully from our private registry.
Wrapping Up!
To sum up, in this article, we have discussed how to use the registry image provided by Docker to create our own private registry in our host machine. We discussed how to tag an image with localhost:5000 so that when we execute the Docker push command on it, it automatically gets pushed to our own private registry. We certainly hope that with the help of this article, you will now be able to create your own private registries. Happy Learning!
People are also reading:
- What is Docker Networking?
- What is Docker Swarm?
- What is Docker Compose?
- What is Docker Container Linking?
- What is Docker Logging?
- Difference between Docker Images and Container
- Docker Interview Questions
- How to Use a Dockerfile to Build Docker Images?
- How to list Docker Images?
- How to Search Docker Images using CLI?