Docker allows us to pack applications in an isolated environment that contains all the packages, libraries, binaries, and system configurations required to run the application. This ensures portability and security. However, this flexibility introduces other problems such as large image sizes and high disk usages. In order to reduce the image size and decrease build time, we need to write the Dockerfile instructions very carefully and in the right order. We know that each Dockerfile instruction adds a separate intermediate image layer over the previous ones and you must remember to clear any such instructions that you don’t need to build images efficiently. To solve this problem, Docker has introduced what we call multistage builds. In this article, we will discuss how to leverage Docker multistage builds to drastically reduce the size of the images. So without any further ado, let’s get started.
Docker MultiStage Builds
In multistage builds, we use multiple FROM-AS instructions inside a Dockerfile where each FROM instruction uses the previous ones or a different one as a base image. And each of them begins with a new build stage. We can choose what artifacts we need from previous builds and leave behind everything in the final image. If we notice carefully, for creating a binary such as GCC, Maven, etc., there are lots of dependencies that we require earlier but are not needed after we have the executable. Multistage builds come to the rescue in this case. Multistage builds, thus, helps us to create reduced-sized images with enhanced caching mechanisms and a narrower security footprint.
How Docker MulitiStage Builds work?
If noticed carefully, multistage builds are not that different from normal builds. The major difference, however, is that in a single Dockerfile, we build multiple independent Docker images, and we have the flexibility to choose the artifacts that we want to copy from these images to others and discard the rest. Each image in a multi-stage build can be referred to as a stage. This helps us to save costs, speed up deployments. We create lightweight and efficient images and hence, we need to ship less amount of data during deployment. We can have a single Dockerfile for the development stage, testing as well as deployment stages.
Example of MultiStage Build
Let’s create a simple Go application, first using a normal Docker image and then using a multistage build. Below is a simple go application named main.go.
package main
import "fmt"
func helloworld() string {
    return "Hello World!!"
}
func main() {
     fmt.Println(helloworld())
}
Here, we have a function that returns a simple hello world message, and then, inside the main function, we call this function and print the output. Consider the Dockerfile below.
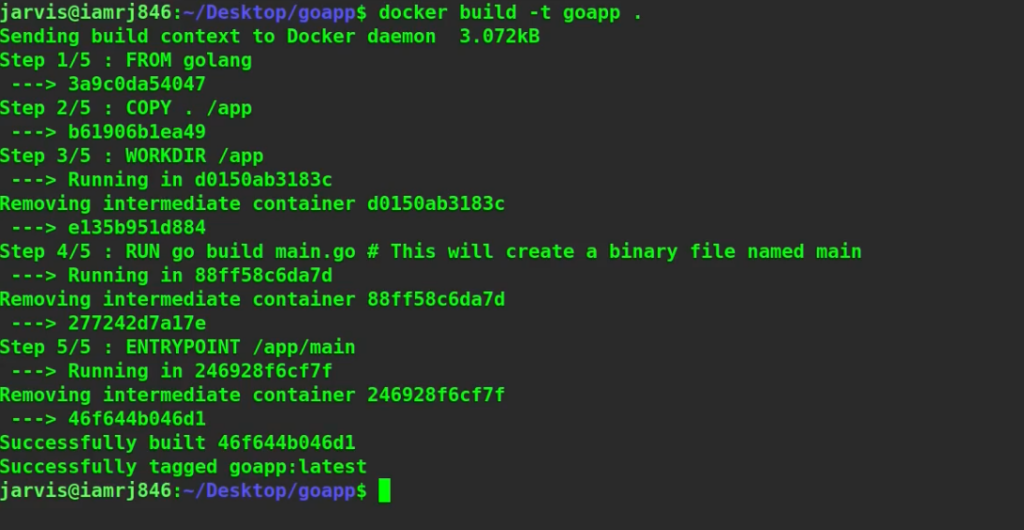
FROM golang
COPY . /app
WORKDIR /app
RUN go build main.go # This will create a binary file named main
ENTRYPOINT /app/main
Here, we have not used any multistage build. We have simply pulled the golang base image from the Docker registry, copied the build context and set the working directory, used the RUN instruction to build the application, and create a binary file. And then, using the ENTRYPOINT instruction, we have instructed the daemon to execute the binary when we run the container. Let’s try to build this image.
$ docker build -t goapp .
Now, let’s try to run a container associated to this image.
$ docker run -it --rm goapp

You can see that the application has been executed successfully. Let’s try to check the size of this image.
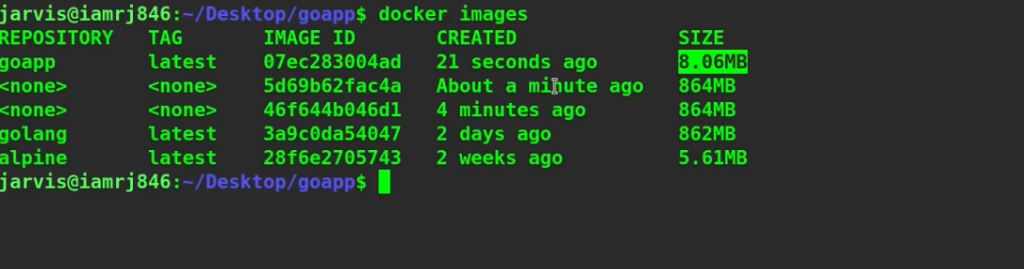
$ docker images

You can see that for such a small application, the size of the image is 864 MB which is huge. Now, let’s build the same application using a multistage build. Consider the Dockerfile below. # Build executable stage
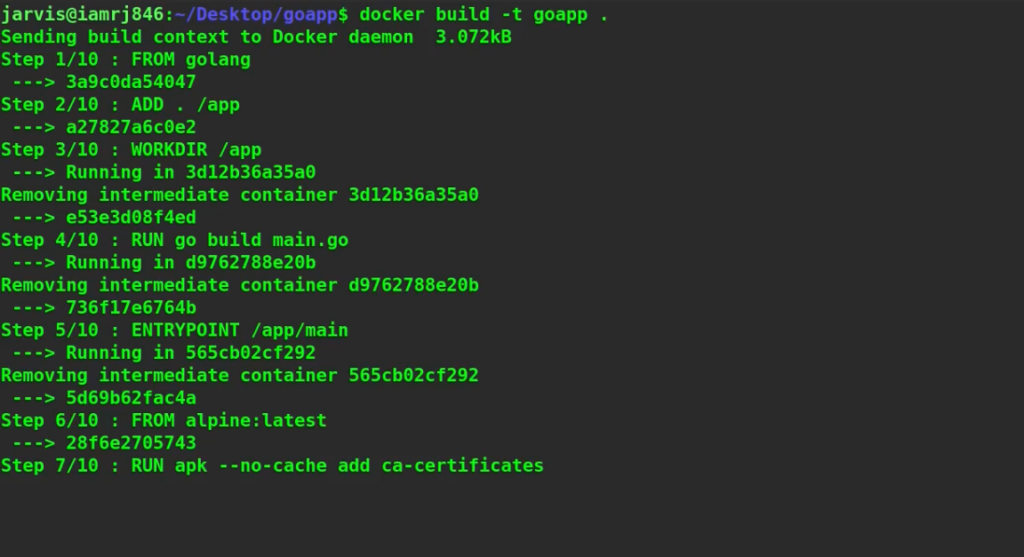
FROM golang
ADD . /app
WORKDIR /app
RUN go build main.go
ENTRYPOINT /app/main
# Build final image
FROM alpine:latest
RUN apk --no-cache add ca-certificates
WORKDIR /root/
COPY --from=0 /app/main .
CMD ["./main"]
Let’s try to create the same application using a multi-stage build. We are building the image in two stages. First, we are using a Golang base image, copying our code inside it, and building our executable file called main. Now in the next stage, we are using a new Alpine base image and copying the binary which we built earlier to our new stage. An important point to note here is that the image built at each stage is entirely independent. Note the line with copy instruction lets you access data from inside the image built in the previous image using the “from” argument. Now, if we try to build it and check the size of the image, we will see a significant reduction in the size of the image. To demonstrate, let’s try to execute this example.
$ docker build -t goapp .
Now, let’s run the container.
$ docker run -it --rm goapp
Let’s check the size of this image.
$ docker images

The size of this image is just 8.06 MB which is around a hundred times smaller than the previous one. Hence, we can leverage multi-stage builds to significantly reduce the build time and size of the images.
Wrapping Up!
To conclude, in this article, we discussed how we can use Docker multistage builds to drastically reduce the image size and build time and create images more efficiently. We hope that with the help of this article, you will now be able to get hands-on with Docker multistage builds. Happy Learning!
People are also reading: