With the recent boom in containerization technologies, developers and organizations are trying to shift their entire technological stacks to containers. Be it microservices architecture or monolithic architecture, containers can fit in all of them.
If you want to create a web application, you can create a database server and host it in one container, create a web server and host it in another, create a separate caching server in another container, and so on.
Exposing ports will allow your containers to communicate and share information with each other. And when we speak about containers, Docker is the first thing that comes to our minds.
Docker is a popular open-source container management platform that allows us to create an isolated and packaged environment with libraries, packages, dependencies, binaries, config files, etc. all pre-installed in it. We can leverage Dockerfiles and Docker registries to create and pull images.
Also, Docker provides tons of pre-built official and vendor-specific images that can be pulled directly from Docker’s official registry called Dockerhub. Some of them are OS instances such as Ubuntu, CentOS, Fedora, etc., databases such as MongoDB, MySQL, etc., and programming language images such as Python, Java, PHP, etc.
We can use these images to create environments quickly without having to go through the hassles of installing packages or virtual environments. However, working with these containers is an art in itself. Once you get yourself started by pulling or building images and containers, the rest is just a piece of cake.
In this article, we will discuss how to run one of the most popular database servers called MySQL inside Docker containers. MySQL is an open-source, free-to-access, relational database server, which helps us to store, structure, and organize data ensuring accessibility.
$ docker pull mysql/mysql-server:latest
How to run MySQL in Docker Containers?
If we want to quickly set up MySQL without eating up too many resources, hosting MySQL in Docker containers is the best solution. We will see how to pull the MySQL image, create containers, and access MySQL inside it.
To start with, you must have access to a Linux machine with Docker installed inside it and you should also have access to Sudo privileges. So without any further ado, let’s get started.
1. Pull the MySQL Server Image from Dockerhub
The first step to creating a MySQL container is to pull the MySQL Server image from Dockerhub. To do so, we will use the Docker pull command. Please make sure you are logged in to Dockerhub through your command line to pull images.
Here, we will pull the mysql-server image from the MySQL repository with the latest tag.

When you execute the pull command, the Docker daemon will first compare the digest of this image with all the images in your local machine. If it finds a match, then it won’t pull the image, as that would be redundant. If the image does not already exist, it will start pulling it from Dockerhub.
2. Running the MySQL Docker container
Here, we will use the Docker run command to run a container associated with our MySQL Server image.
$ docker run --name=mysql1 -p 3306:3306 -e MYSQL_ROOT_PASSWORD=<pwd> -it mysql/mysql-server:latest
Here, we have used the following options.
- --name : This option allows us to specify a name for our container.
- -p: We can use this option to publish ports. By default, the MySQL Server image exposes the 3306 port and we will connect it to the 3306 port in our own machine. We can publish any other port also.
- -e: We can use this option to set environment variables inside the container. We will set the default root password using this. We just need to set a password to the MYSQL_ROOT_PASSWORD variable.
- -it: These are two options named interactive and pseudo TTY which are often used together to access the container’s bash in interactive mode.
- Lastly, we have specified the image repository name, image name, and the tag of the image of which we want to run the container.
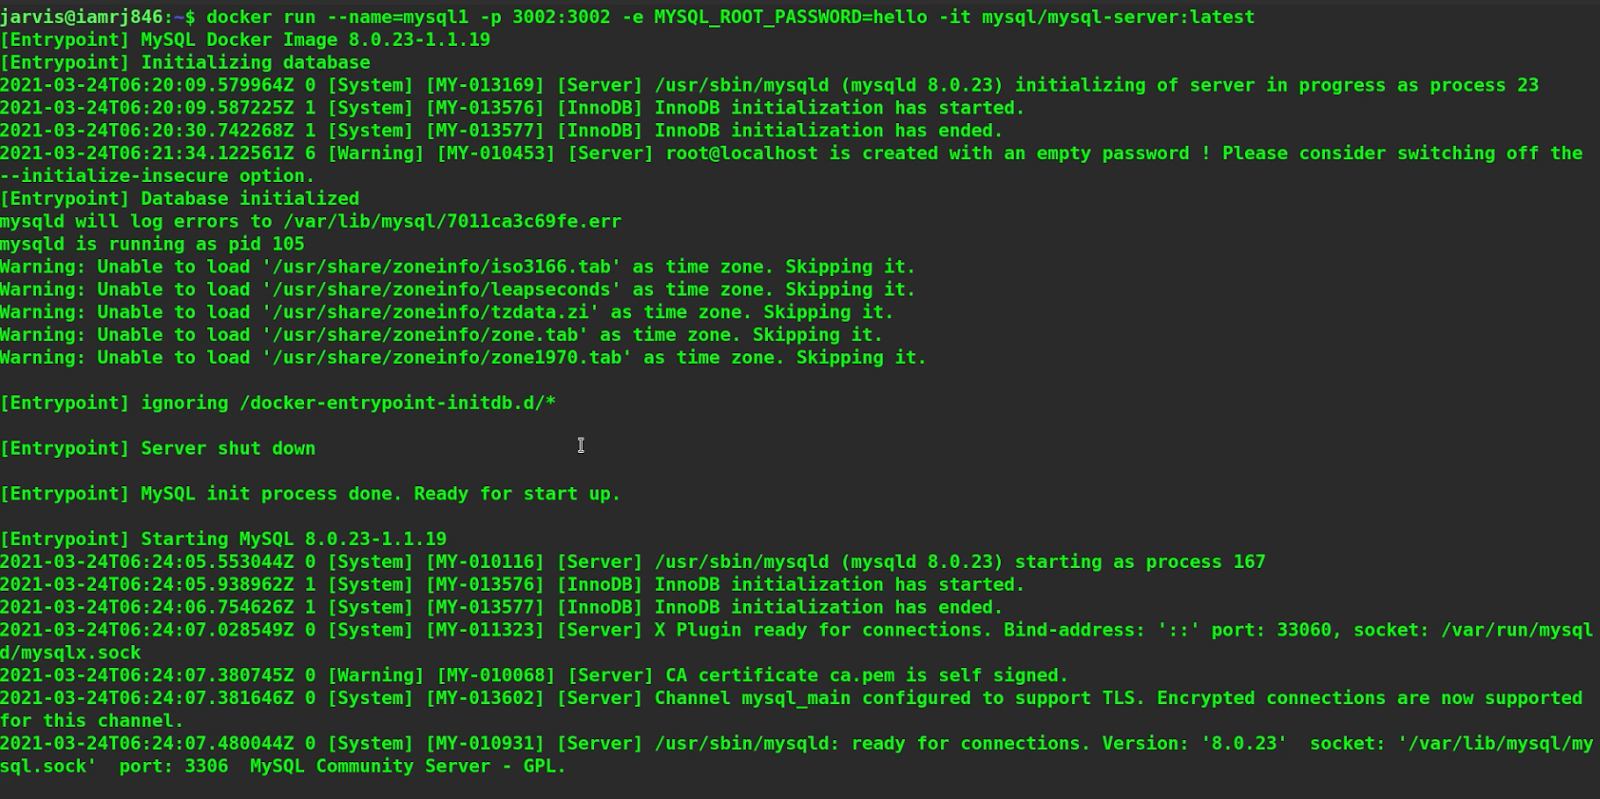
Here, you can see that after executing the Docker run command, the daemon starts the MySQL starts, initializes the database, creates a root server, exposes ports, and is now ready for connection. At this point, we keep this container running inside this terminal and start a new terminal.
3. Executing the MySQL command
Now that our MySQL Server is actively running inside the container, keeping this container running, we will start a new terminal. Inside this terminal, we will run the Docker execute command to run the MySQL command inside the terminal.
$ docker exec -it mysql1 mysql -uroot -p
In the above command, the Docker exec command is used to run commands inside containers that are actively running or running in detached or background mode. We have used the -it options to access the MySQL command-line client and interact with it. Also, we have mentioned the MySQL command that we want to run inside the container.
Along with it, we have specified the -u option along with the name of the user which is the root, and the -p option which will generate a prompt asking us to input the password.
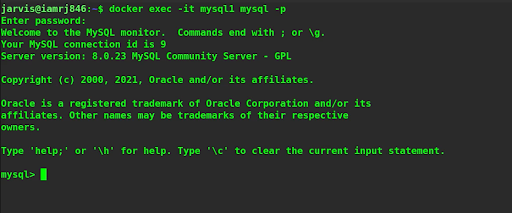
After you have entered the password which you mentioned in the Docker run command, you will now be able to get hold of the MySQL client and execute commands inside it. This method is useful if you want to run the MySQL server on the same machine as the one where you want to access the MySQL client.
You can also create a MySQL container in another server, run the container in the background or detached mode, and access the server using the client on another machine. This is very useful in the microservices architecture.
Wrapping Up!
To conclude, in this article, we discussed how we can leverage Docker containers to run MySQL without going through the hassles of downloading, installing, and configuring the MySQL servers and clients. We discussed how we can simply pull a MySQL server image, create a container, and access the MySQL client using simple commands.
We hope that using this article, you will be able to get hands-on with running MySQL inside Docker containers.
Happy Learning!
People are also reading:
- How to create volumes in Docker?
- How to use Docker multistage builds?
- Microservices Interview Questions
- How to run commands inside Docker containers?
- How to search Docker Images using CLI?
- Docker Interview Questions and Answers
- How to list Docker Images?
- Docker Images vs Containers
- What is Docker?
- Python Client Library API for Docker
- SQL Interview Questions
- What is Docker Container Linking?