There used to be a lot of mismanagement inside the IT companies about the continuous delivery of release artifacts before the DevOps kicked in. In earlier times, the developers would build a product and spend time handling the builds needed to release it into the real-time environment. It used to be a frantic and bloodsucking task for organizations.
Welcome the DevOps. DevOps forged ahead into the IT world with a blink of an eye and improved a lot of collaboration between teams. It also helped accelerate the delivery process with more accuracy and continuous integration. To define it in simpler words, DevOps is a combination of philosophies, tools, and practices that increases the product delivery of organizations.
Well, a plethora of DevOps tools is out there today that accelerate the delivery process of products. Among all, Jenkins is widely used for continuous integration. It is an open-source automation server replete with an array of plugins useful for automating the development and deployment of any project.
Let us understand Jenkins in-depth in this blog post.
What is Jenkins?
Before knowing what Jenkins is and how it works, we must understand the importance of continuous integration. Continuous integration (CI) is a practice where developers worldwide imbibe the habit of continuously merging their code to a central repository as some value addition. After merging the code, some tools like Jenkins would help them automate the builds and test the application. How cool is that?
Jenkins is an open-source automation server used to automate the continuous build process. The builds further help an organization to do testing timely and plan the regression activities, if any.
How does Jenkins Work?
Jenkins can run on various operating systems as a server. It requires Java 8 or above to be installed successfully. After installation, it runs as a Java servlet.
The whole working of Jenkins depends on the pipeline we create. A Pipeline is a set of steps that Jenkins uses to perform actions on the latest commit. Due to these tests, we get to know the application’s stability, and the developer can know if his/her changes are not breaking the build. This set of steps can also be written in JenkinsFile, which we will discuss later.
Jenkins Features
Let’s go through the salient features of Jenkins one by one.
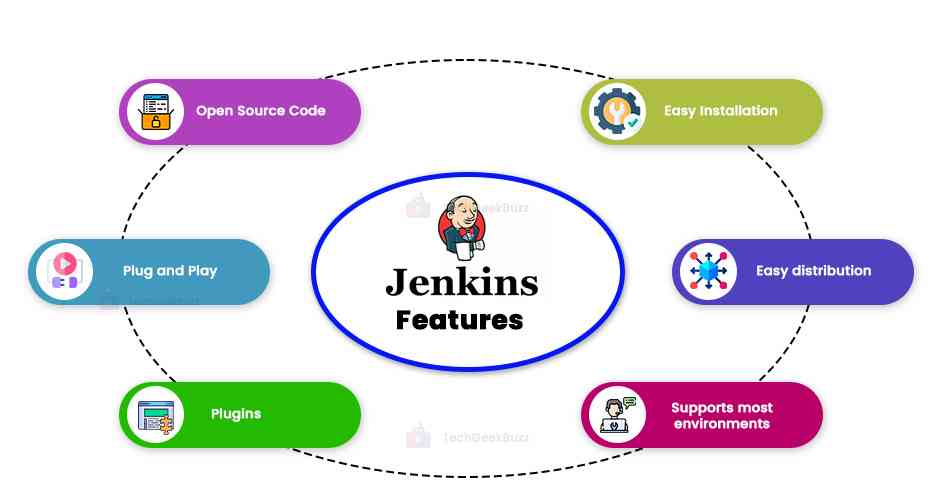
- Open source code - Jenkins is an open-source tool and is free to use. It has a wide variety of developers actively working to improve it. During the creation of this article, it was checked that the last commit was 11 hours ago in the Jenkins Github repository.
- Plug and play - Jenkins uses JenkinsFile to perform a series of steps. This file is transferable to any different machine, given the variable naming convention is the same
- Jenkins configuration.
- Plugins - Jenkins offers a variety of plugins that can be used in integration with different applications like sonarQube and Kubernetes . You can install/uninstall these plugins anytime. During setup, it offers a choice between the manual and automated installation of plugins. It’s always good to go with automated installation.
- Easy installation - Jenkins installation is straightforward as we just need to run the war file. There is no other prerequisite attached to it. We are just starting the Jenkins server. localhost:8080 will run on our local machine based on our settings.
Advantages and Disadvantages of Using Jenkins
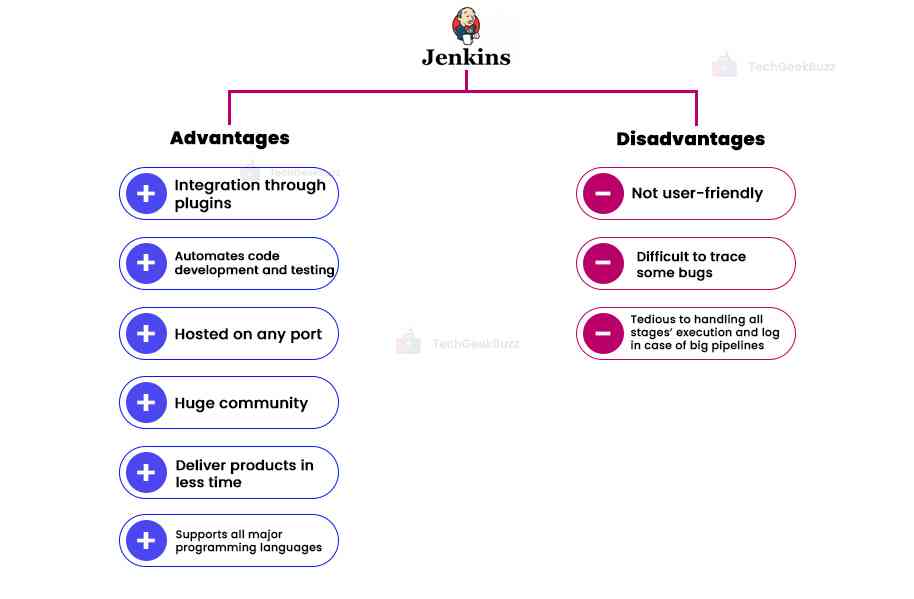
The following are the advantages of Jenkins:
- Wide range of plugins which helps quickly integrate another framework.
- It easily automates the building and testing of the code with a given set of test cases that developers cant do after every commit.
- It can be hosted on any port in our local machine and used with a GUI
- There is significant community support that is actively working to improve it.
- Due to the CI feature, it helps organizations deliver the product in less time.
- It supports almost all programming languages .
- It’s free.
Here are some points where Jenkins can improve upon:
- UI of Jenkins is not user-friendly and is sometimes frustrating to work with.
- The stack trace doesn’t have adequate information and can be tough to trace for some specific bugs. One has to look into the community support forums for help.
- There are a lot of plugins. Simply A LOT! This confuses people when uninstalling and installing are required.
- If the pipeline is big, handling all the stages’ execution and logs will be tedious.
Configuring Jenkins in our System
1. Go to the URL and download the Generic java package(.war).
2. Open the command prompt in your machine and type the following command.
Java -jar <war>
3. In the above command, drag-drop the war file you downloaded from point 1.
4. After execution, this should be the last line at the command prompt.
hudson.lifecycle.Lifecycle#onReady: Jenkins is fully up and running
5. This installation might result in an error if your 8080 port is occupied. If you can stop the website hosted on 8080 in your machine. Otherwise, you can always manually change the port of Jenkins during installation.
6. Use this command to redirect Jenkins to a different port of your choice.
java -jar C:\Users\paritoshlouhan\Downloads\jenkins.war --httpPort=8081
7. If you have changed the port, then visit that port. For example, if you have not changed the port, open http://localhost:8080. Initially, it will ask to write down a password. The location to find that password will also be mentioned there.
8. After that, it will prompt you to choose plugin installation. You can choose ‘Install suggested plugins.’
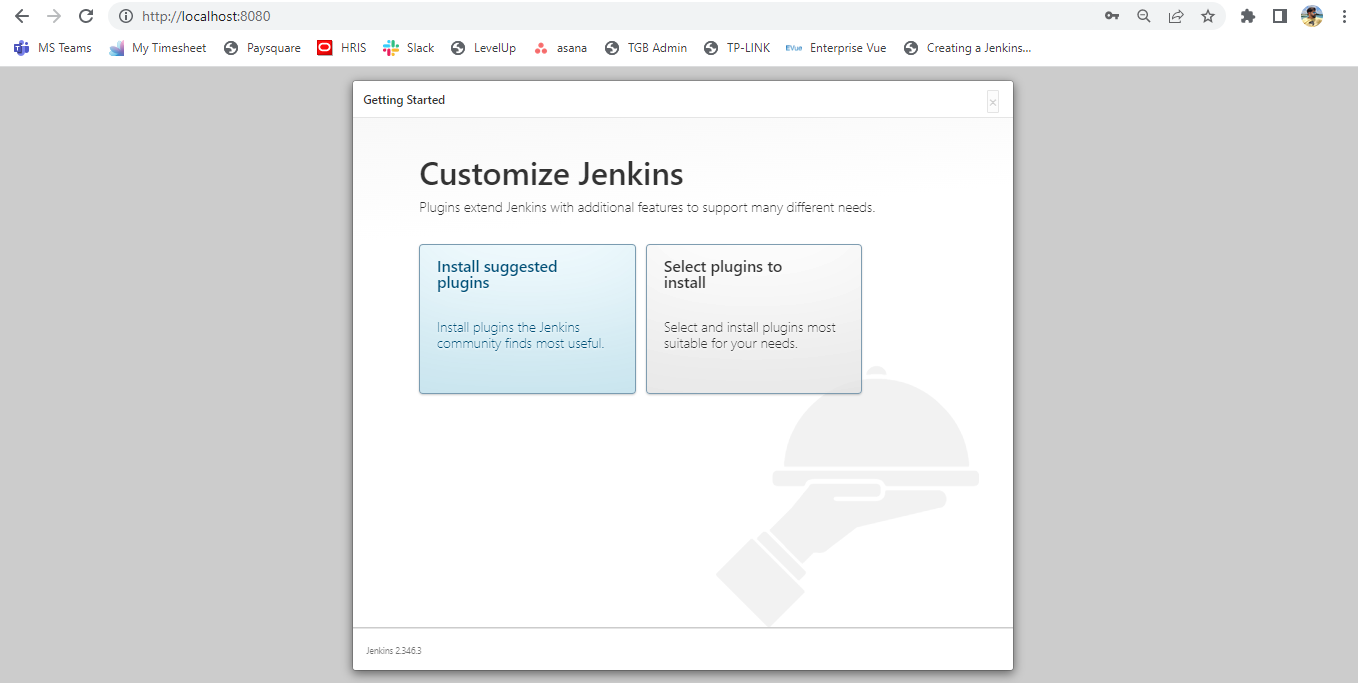
9. It will take a couple of minutes to install plugins. After that, it will ask you to create credentials for the same.
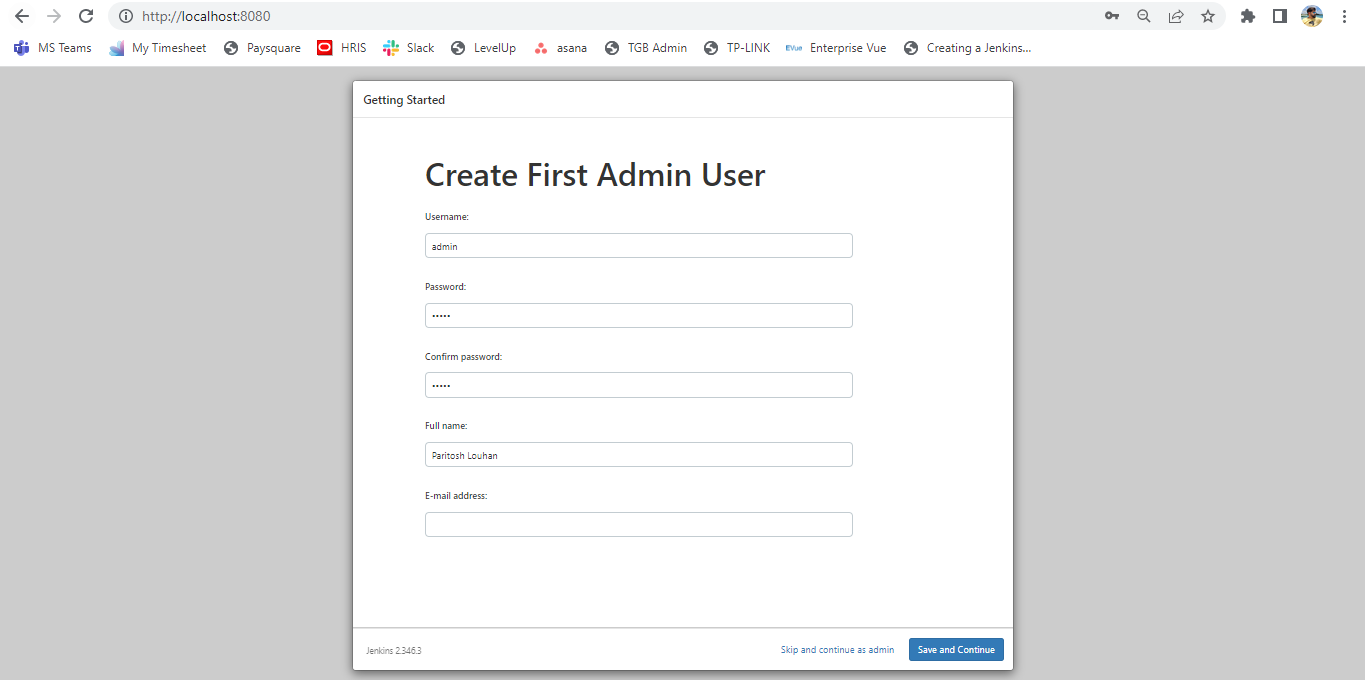
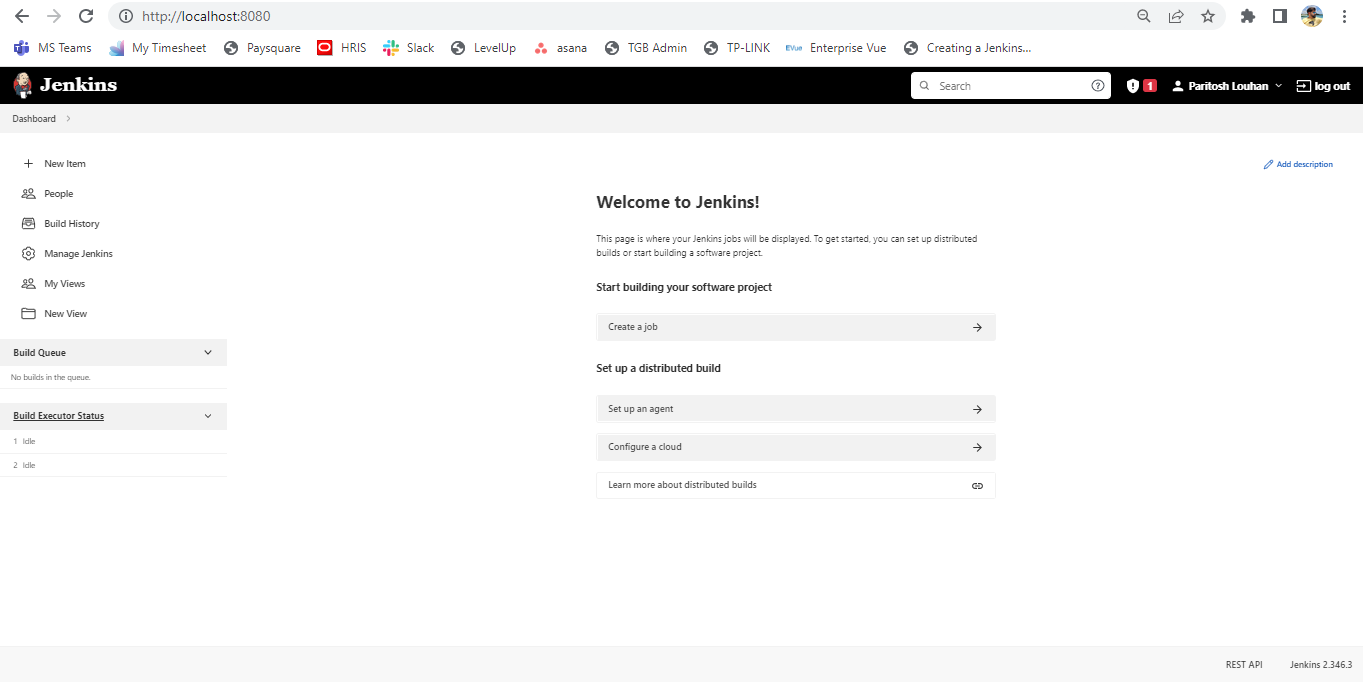
10. After successfully creating the user, Jenkins will welcome you to its dashboard.
What is Jenkins Pipeline?
Jenkins pipeline is a collection of events that Jenkins manages. It’s a set of jobs that are run in series and are interlinked with one another. It provides some output as artifacts and logs of each stage in the pipeline.
We can create a pipeline as per our needs. We can create it on the Jenkins website or make a JenkinsFile and commit that to the Github repository. After running the pipeline, Jenkins will checkout the JenkinsFile and run the pipeline as mentioned by the user.
Syntax
pipeline {


stages {


stage('Nuget Restore') {


steps {

bat "dotnet restore hello-world.sln"

echo "**************Nuget Restore started**************"

}
}
}
}
This is an example of creating a stage in the Jenkins pipeline. The name of this stage is Nuget Restore. This name can be anything according to our needs.
We need to create multiple stage sections inside stages.
Each stage corresponds to one job. If a job fails, Jenkins stops executing the further stages.
For example, let’s create an empty pipeline to learn basic steps before hopping in to get our hands dirty!
Steps to Create a Basic Pipeline
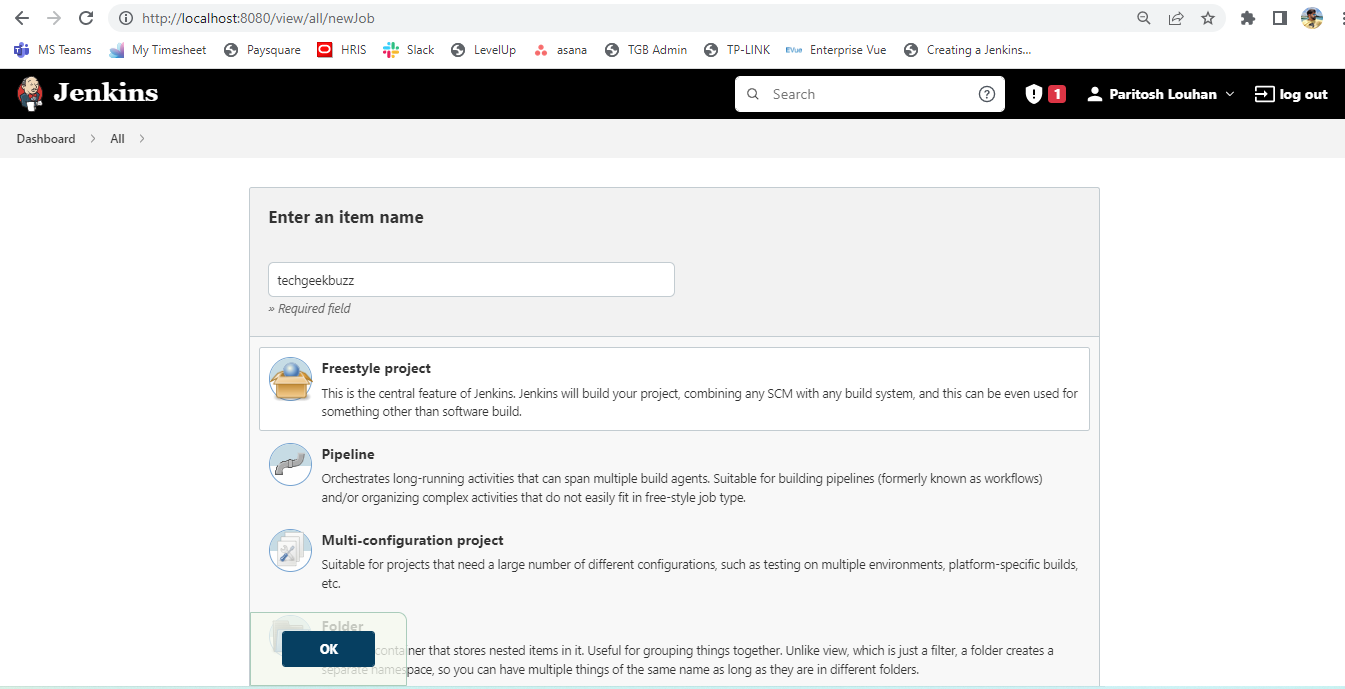
1. To create a pipeline, go to the New Item option at the left top section of the screen on the dashboard, and name your pipeline. After naming, select the freestyle project to create the simplest pipeline. This will be your first pipeline.
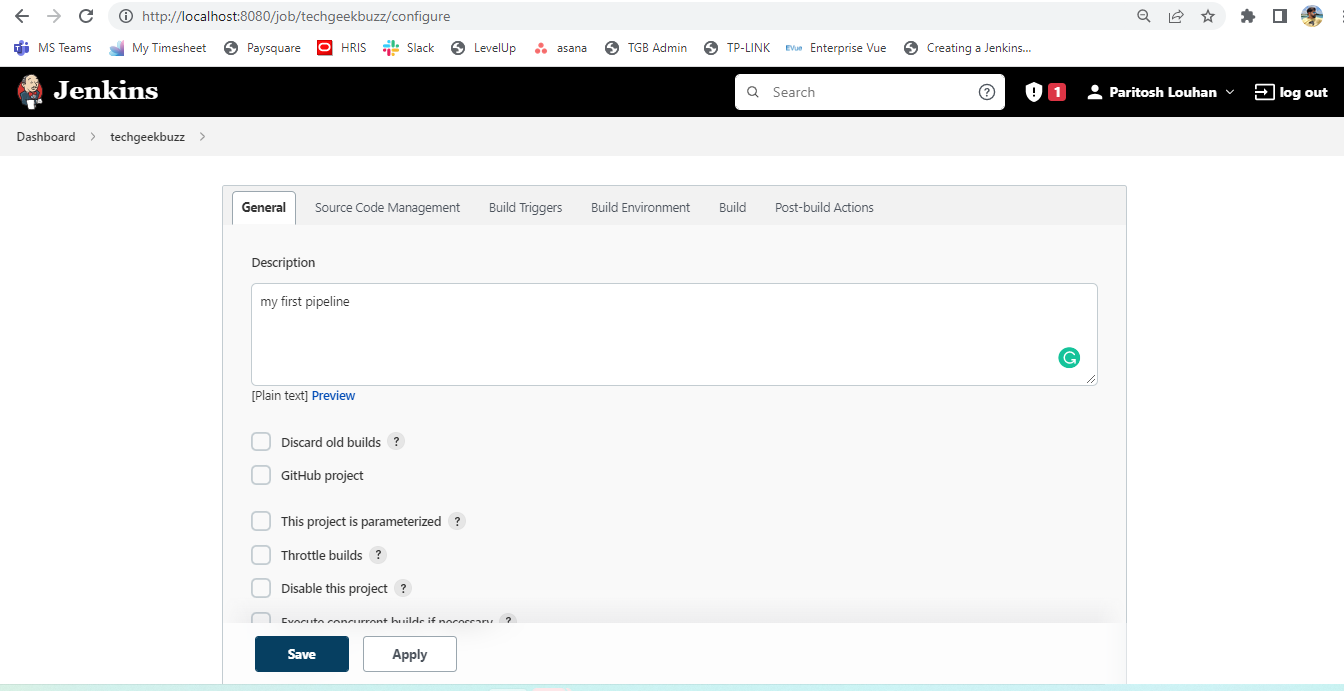
2. After selecting the freestyle project, go ahead and put some description to it. Scroll down, and you’ll see the prompt to link the codebase. For now, select none. We will teach you to create a multibranch pipeline from Github in the next article.
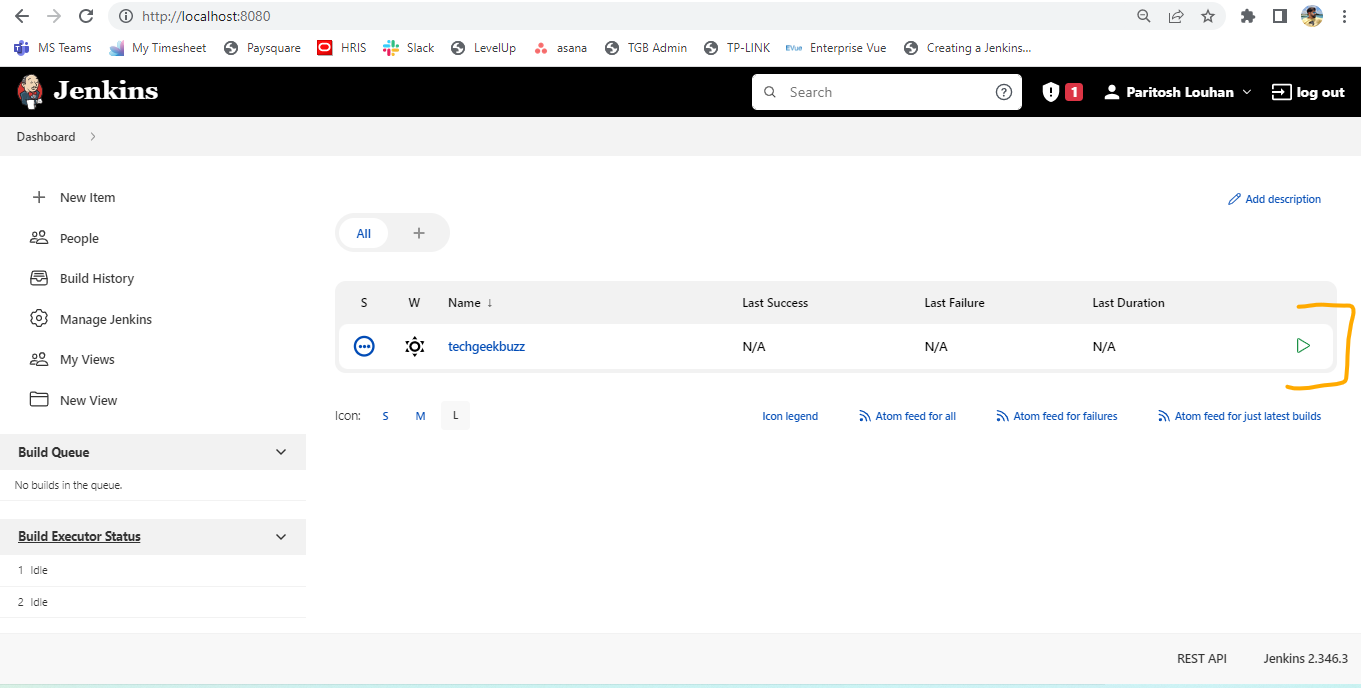
3. After saving your pipeline details, go to the dashboard again and see the pipeline row. All you need to do is click that triangle button to run your first pipeline. Remember that this is an empty pipeline. It won’t create any artifacts.
What is JenkinsFile?
JenkinsFile is a text file that contains the definition of the pipeline. Creating a pipeline for any project entails creating a series of steps and executing further on the codebase. You can mention these steps while configuring the pipeline and in the JenkinsFile.
For the multi-branch pipeline, it is mandatory to create a JenkinsFile and deploy that on Github. Jenkins will fetch its details by itself and will execute accordingly.
Example
pipeline {

agent any

stages {

stage('Nuget Restore') {

steps {

bat "dotnet restore hello-world.sln"

}

}

stage('Test') {

steps {

bat "dotnet test -l:trx;LogFileName=file.xml"

}

}

stage('Build') {

steps {

bat "dotnet build"

}
}
}
}
Points to remember while creating JenkinsFile
- It should be at the root of your application.
- It should not have any extension.
- Make sure to create JenkinsFile using Groovy syntax.
- Keep logging in to the JenkinsFile so that you get to know the root cause if it breaks.
Jenkins Plugins
Plugins are one of the essential features of Jenkins, enhancing its ability to get integrate with multiple languages. These are the additional features that help build, test, and integrate an application with Jenkins. Some of the essential plugins for Dotnet projects is MSBuild. It helps in building the Dotnet applications and can be used in pipelines.
Where to Find Plugins?
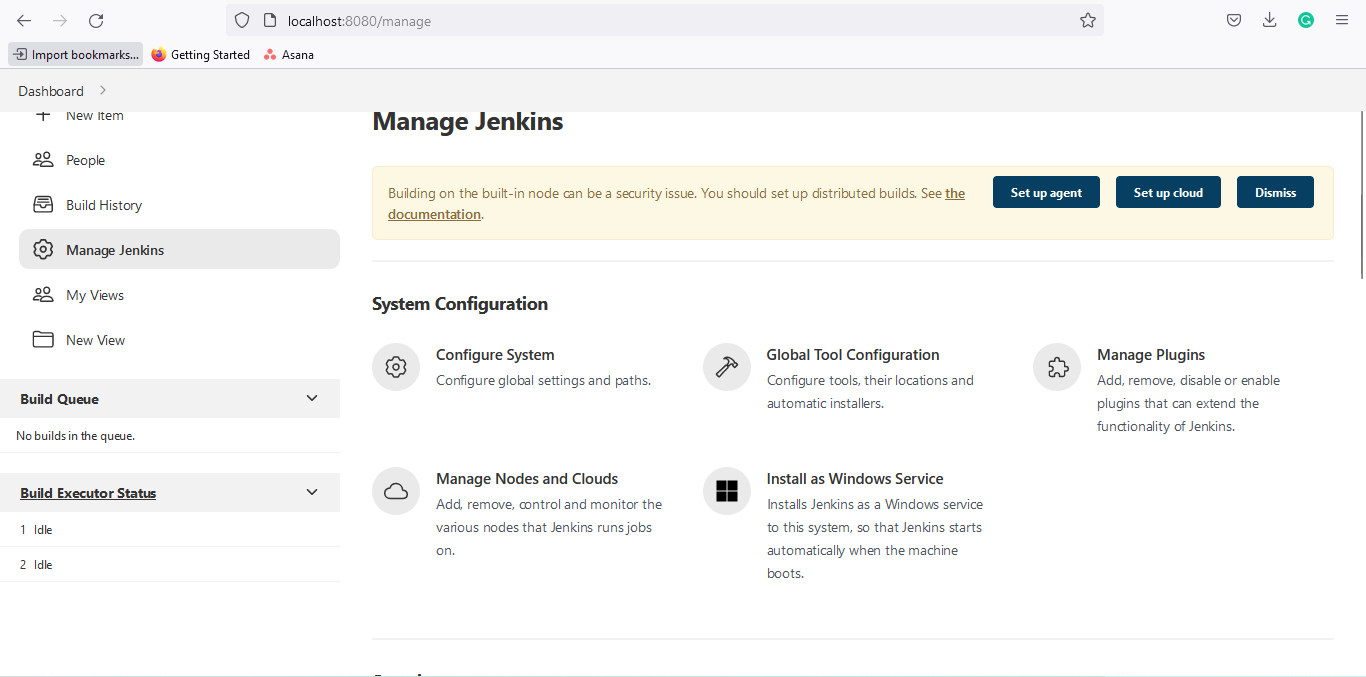
Go to ‘Manage Jenkins’ in the left panel and select ‘Manage Plugins’ from the options. In the Manage Plugins option, you can search for any plugin in the search box, and all the plugins are categorized as per the installed and available form.
Example
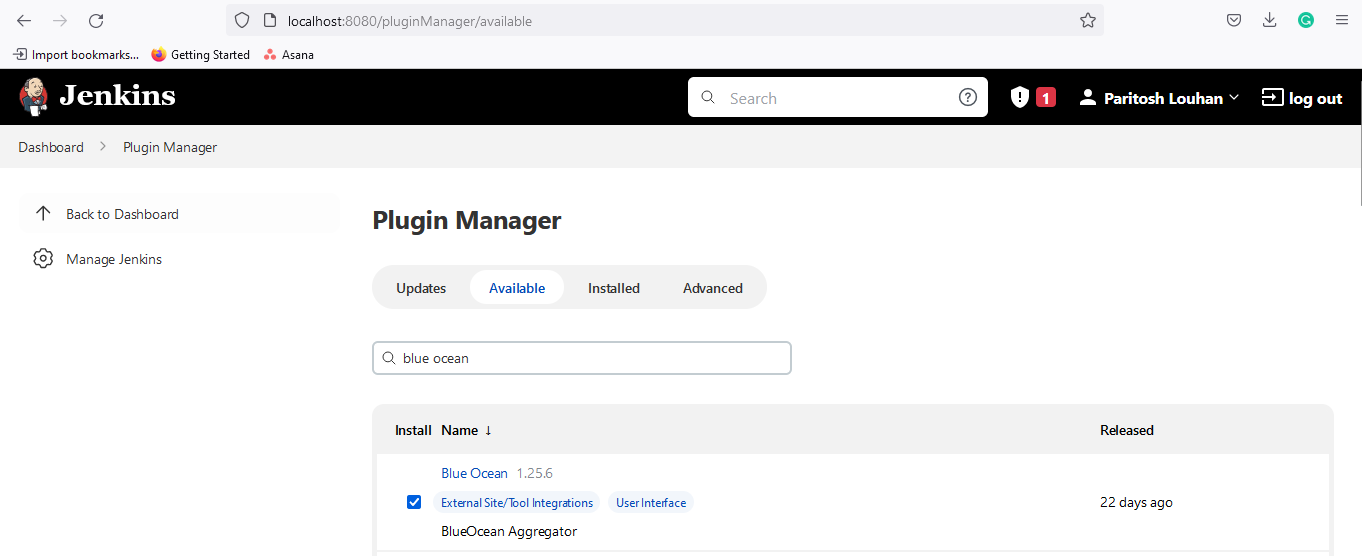
Let’s consider the Blue Ocean plugin for demo installation.
The Blue Ocean plugin enhances the user experience by personalizing the UI based on the roles of the DevOps team members. This plugin reduces the clutter and increases the developer’s productivity when collaborating with other developers on Github and BitBucker.
How to Install Blue Ocean?
Go to the Manage Jenkins section and select the available tab. Check the Blue Ocean plugin and select install without restart.
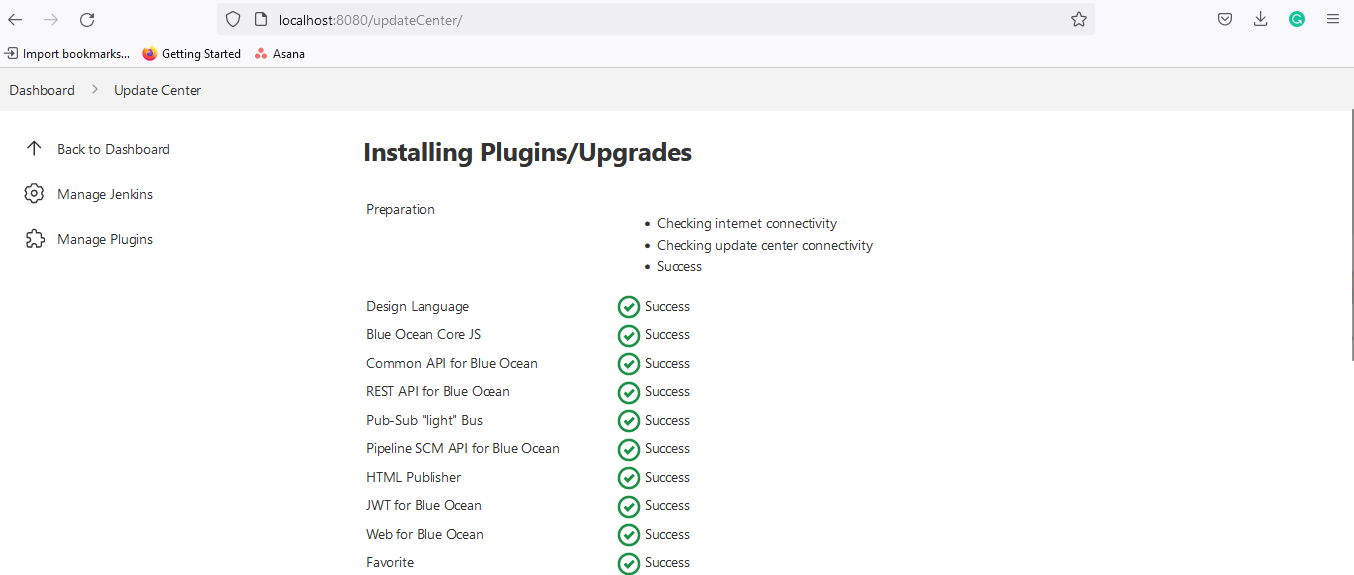
In the next page, it will be installed successfully.
Conclusion
Jenkins is widely used in almost all organizations. It is indeed important to update your skill set to understand the basic working of DevOps. Just being a developer is not enough in today’s competitive world. This article is created to make you understand the basic working of Jenkins. If you have done the hands-on while reading this article and have created your first pipeline, then we are all set to take off to our next goal, i.e., creating our first multibranch pipeline with JenkinsFile.
Please let us know in the comments if you find anything missing in this article. We will edit this article and update it to your expectations.
Thank you for your time!
People are also reading:


