Linux has a galore of commands. Knowing all of them takes several years of experience and lots and lots of work. If you're just starting out with Linux then you must begin with the basic Linux commands. Here in this article, we have provided some of the most elementary CLI commands in Linux, which we often use when we interact with the Linux terminal. Many of the hosting servers support the Linux dashboard to host a website, so a web developer needs to have knowledge of these basic commands in Linux.
Basic Linux Commands for File Management
Here are some basic commands we frequently use when dealing with files and directories in Linux:
| Command | Description |
| pwd | It shows the directory on which you are currently in. It stands for print work directory. This command is useful when you want to check the path of the file. |
| ls | Shows all the content and files present in the directory. |
| ls -a | This command is used to list all the files including the hidden ones. |
| cd | cd stands for change directory. It’s used to move from one directory to another. |
| mkdir | mkdir stands for make directory . This command helps to create a new directory. |
| rmdir | Used to remove an existing directory. Note : Only removes an empty directory. |
| lsblk | This command is an extension of the ls command. It shows a tree-like structure of your block devices. |
| mount | Used to mount the SD card and USB to the existing files. |
| df | The df command shows the vital information about the disk space. |
Basic System Commands
There are many commands in Linux that show information about the device and OS. These commands come in very handy while dealing with software in a Linux system.
| Command | Description |
| uname | The uname command is used to get the system information, such as system name, version, and operating system. |
| ps | The ps command visualizes the current process running on your system. |
| kill | Used to stop or kill any running or stuck process. This command comes useful when any process is stuck due to limited resources. |
| service | Used to manipulate the system. |
| batch | It is used for automating the script. |
| shutdown | This command is used to close the Linux terminal. |
Linux Commands for File M anipulation
| Command | Description |
| cat | The cat command can be used for multiple purposes, such as to create a new file, view the content of the file and redirect output to another command-line tool or file. |
| touch | The touch command creates a valid empty file. |
| head | Using the head command, we can view the beginning of the file from the terminal. |
| tail | The tail command is just the opposite of the head command. It is used to show the tail of a file. |
| cp | This command is used to copy a file from one folder to another. |
| mv | Used to move a file from one folder to another. |
| comm | Used to compare two files for common and distinct lines. |
| less | The less command is used to view the content of the file. Unlike the cat command, less can view the content of the file in both the directions. |
| ln | The ln command is used to create symbolic links to the specific files. |
| dd | The dd command copies and converts a file from one type to another. |
| alias | This command can only be used by the system admin and it can replace a word with another string in the file. |
Basic Linux Commands for Search
In Linux, we have the concept of a regular expression that comes very useful while performing the search operation in the terminal.
| Command | Description |
| find | With the find command, we can search a file from the terminal. |
| which | It is used to search the executable files. |
| locate | The locate command is used to find the location of a specific file. |
| grep | This command is used along with a regular expression to find a specific pattern from a file. |
| sed | The sed command replaces the specific text from a text file. |
Basic Linux Commands for I/O
There are many basic commands in Linux that we use so often to increase the interactivity with the terminal.
| Command | Description |
| clear | The clear command is used to clear out all the written commands and their output. It refreshes the terminal. |
| echo | Used to show the text output. |
| sort | The sort command can arrange the files in alphabetical order. |
| sudo | With the sudo command, a non-admin or guest user can manipulate the low-permission files. |
| chmod | The chmod command changes or modifies the access permissions of system files or objects. |
| chown | The chown command is used to change the ownership of a file or directory. |
Some More Commands
| Command | Description |
| tar | The tar command extracts the archive files. |
| history | This command shows all the commands that had been entered in that terminal since it was opened. |
| mail -s 'subject' -c 'cc-address' -b 'bcc-address' 'to-address' | Used to send mail from the terminal. |
If you are an avid Linux user or have just started with it, the Linux Command-Line is one of the handiest tools that you will come across. The Linux command-line lets you perform several operations on files such as creating, deleting, modifying, etc.; it allows you to set and modify permissions and manage users and groups, traverse across directories, find patterns in files, and perform a ton of other useful tasks as well. Hence, having hands-on knowledge of the Linux terminal commands will help you a lot in the future. In this comprehensive guide, we will walk you through the top 50 Linux terminal commands that are frequently used by Linux users with all levels of experience. All you need to have is access to a Linux machine, a terminal, and sudo privileges. Also, please note that working with the sudo command is always risky, especially when you are dealing with important configuration files as you might mess up your system. Hence, it’s strongly advised to use these commands with the utmost care when you are logged in as a root user. So without any further obstruction, let’s jump right on.
Basic Linux Commands
1. alias
You can use the Alias command in Linux to give an alias name to any command. This will allow you to give short names to long commands and thus save you a lot of time. For example, let’s give an alias to clear commands that can be easily used to clean the terminal.
$ alias cls=clear
 After executing the cls command, it will clear your terminal.
2. cat
The cat command is shorthand for concatenation which lets you display all the contents of a file inside the terminal rather than having to open it.
$ cat ~/sample/file1.txt

3. cd
This command stands for change directory and allows you to move back or forward to another directory. You can also specify a new path along with the cd command to move to a different location.
$ cd ~/Documents
 To move a directory backward, you can simply put two dots along with the command.

4. ls
The LS command allows you to list all the sub-directories and files inside a directory. It will simply give you a list of the files and directories without displaying any other information related to them. Also, please note that by default, it doesn’t display hidden files.
$ ls
 You can also use it with
-l
option to print other detailed information regarding a file such as a file type, permissions, date modified, user, and group info, etc. This option is particularly useful when you want to know and modify file permissions or change the user or group ownership of the file. This will give also tell you the file type as well as a 9-character-set which tells you the specific permissions that the user, group members, or other users have on files.
$ ls -l ~/sample/file1.txt
5. Chmod
The CHMOD command in Linux is used to set or modify file permissions. There’s a specific syntax to understand this command. When you list the information of a file using the ls -l command, you will find that there’s a set of 9 characters which can be divided into 3 sets of 3 characters each. Each set of 3 characters denotes the read, write, and execute permissions of a file for the owner, group member, and rest of the users. We can modify or set this information using the CHMOD command. For example, the file below has read and write permission for the owner and group members but only the read permission for other users. Let’s modify it to give full permission to all the users.
$ chmod ugo=rwx ~/sample/file1.txt
 Here, we u =user, g = group, o = others.
6. Chown
This command is used to alter or set the ownership of a directory or any file in Linux. We can use it to set or alter the group or owner or both. When a file in Linux is created for the first time, the one who creates it becomes the owner, and the file is allocated to a group. By default, the group is the same as the username. Let’s try to change the ownership and group of a file.
$ chown test:test1 ~/sample/file1.txt
 You need access to sudo privileges to change the permissions. You can see that both types of ownership have now been changed.
7. Pwd
This command stands for print working directory and is used to print the current working directory in Linux. If you want to get the relative as well as the absolute path of any file inside a directory, you can use the pwd command once you are inside the directory.
$ pwd

8. Mkdir
This command stands for make directory and is used to create a new directory in Linux. You can specify the path where you want to create the directory. However, it is better to simply create the directories using a GUI-based file manager if you don’t have to get sudo permissions or create files in those directories for which you don’t have the write permission. In such a case, you should always use this command.
$ mkdir {folder name or path}

9. Cp
This command stands for copy and is used to copy files and directories from one location to another in Linux. You can use this command to copy the files, symbolic links, metadata, directories, or any other type of file. You just need to provide the appropriate options along with the command. Below is the syntax for the cp command in Linux .
$ cp <source-path> <destination-path>
 Here, you can see that we have copied a file from the sample folder to the Documents folder.
10. Mv
The mv or the move command is to move a directory or a file from the source location to the target location. You can also use it to rename files or directories in Linux. You can move all types of files and directories if you have the appropriate write permissions in both these directories. Also, please note that if you are moving the file inside the same directory, it works as a rename operation. The syntax is quite simple.
$ mv <source-file-path> <dest-file-path>
 In the above example, you can see that we have successfully moved the folder from the sample directory to the Documents directory.
11. Rm
This command is used to remove a directory or a file. To delete a folder, we need to use a -R option along with the command which stands for Recursive. It recursively searches for all the files and sub-directories inside a directory while deleting them one-by-one.
$ rm <file-path>
$ rm -R <directory-path>
 You can see that we have removed both the file and the folder inside the sample directory.
12. touch
This command is used to create a new empty file in Linux. We just need to specify the path along with the file name. This command is very handy if you want to create and manipulate files using the command line and it’s generally used along with other commands to insert new content insid the file such as the echo command, etc.
$ touch <path-or-filename>

13. Ln
We can use the ln command to create a soft link or a hard link. A Soft link is just a reference that points to another file in Linux. By default, it creates a hard link, but we can use the -s option to create a soft link.
$ ln -s <source-file> <link>
 Here, if we use the
ls-l
command on the new file, we will see that it’s pointing to the original file.
14. Echo
We can use the echo command to display anything on the terminal. If we want to display a message, we can simply write the message along with the echo statement. It can also print variables in the Linux system.
$ echo “Hello and Welcome to this Tuitorial\!”

15. Less
The cat command is used to print the entire content. What if the content is too large to be displayed on the screen? In such cases, we can use the less command to break the content displayed and allow scrolling through it. We can even pipe this command with the cat command.
$ cat /boot/grub/grub.cfg | less
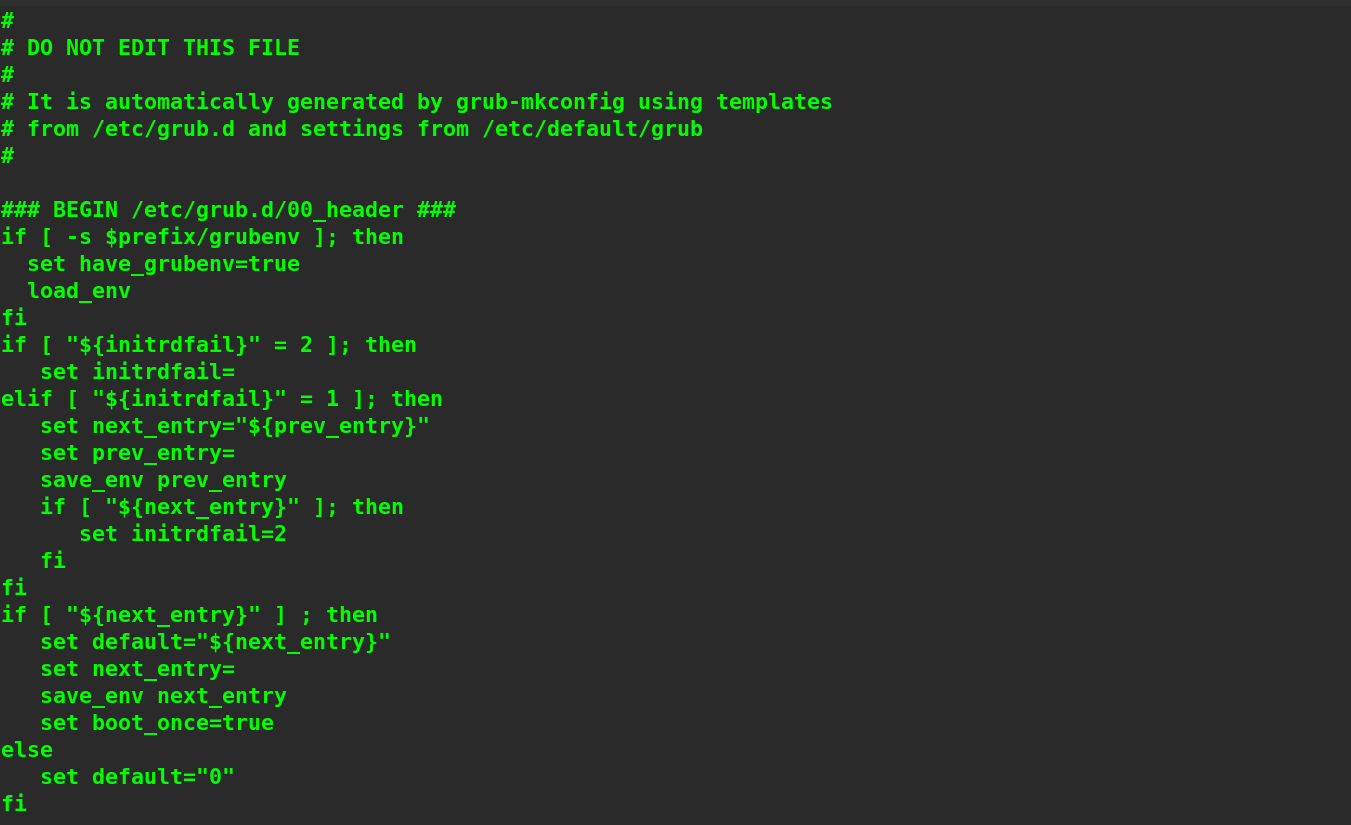 The configuration file is large and you will be able to perform scrolling in the terminal itself to view the entire content.
16. Top
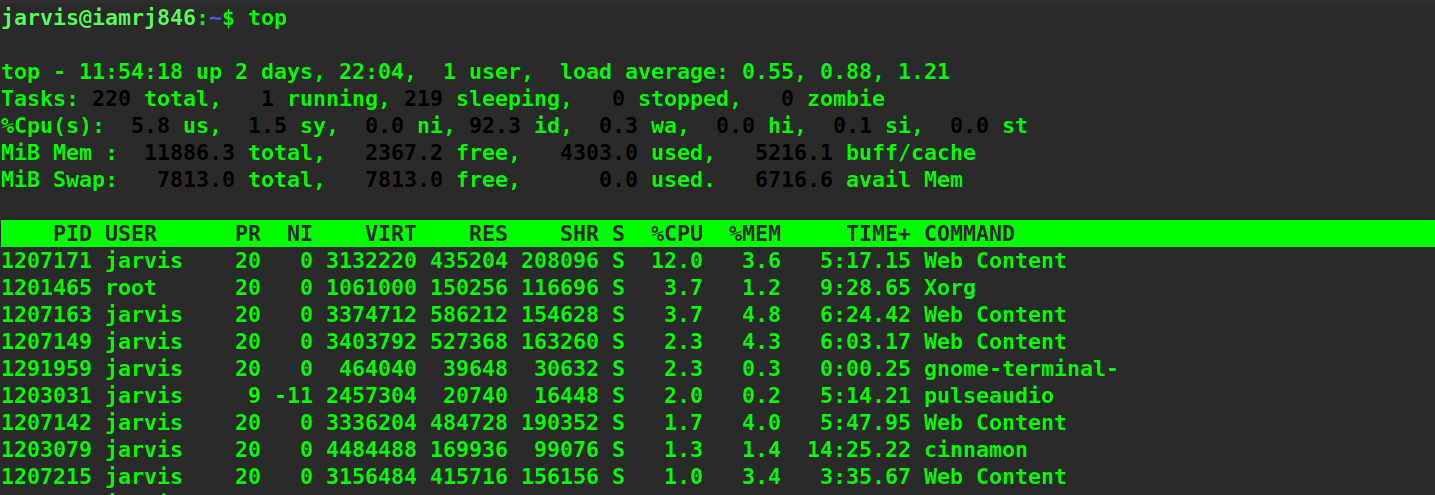
If you want to know what processes are running on your system currently and what’s the amount of resources they are taking up, you can use the top command. This command generates a list of all the active processes with parameters such as process ID, user, CPU usage, Memory usage, the command used to run that process, etc. This is very useful in cases when your PC is running on 80% - 90% load and you want to remove some useless processes.
$ top
17. Curl
You can use the curl command to transfer data to and from a web server. It will print the entire html script of the web page inside the command line. This is not human-readable and hence, it’s better to use the wget command discussed next to download the HTML page, open it in a text editor, and then view it. You can also attach this command with a keyboard key combination to create a shortcut to open a webpage directly.
$ curl -s https://www.google.com

Curl command can be used to interact with API's with different variations like GET, POST, PUT, DELETE. The default one is GET. Hence the above example shown is also using GET method of an http request.
18. Wget
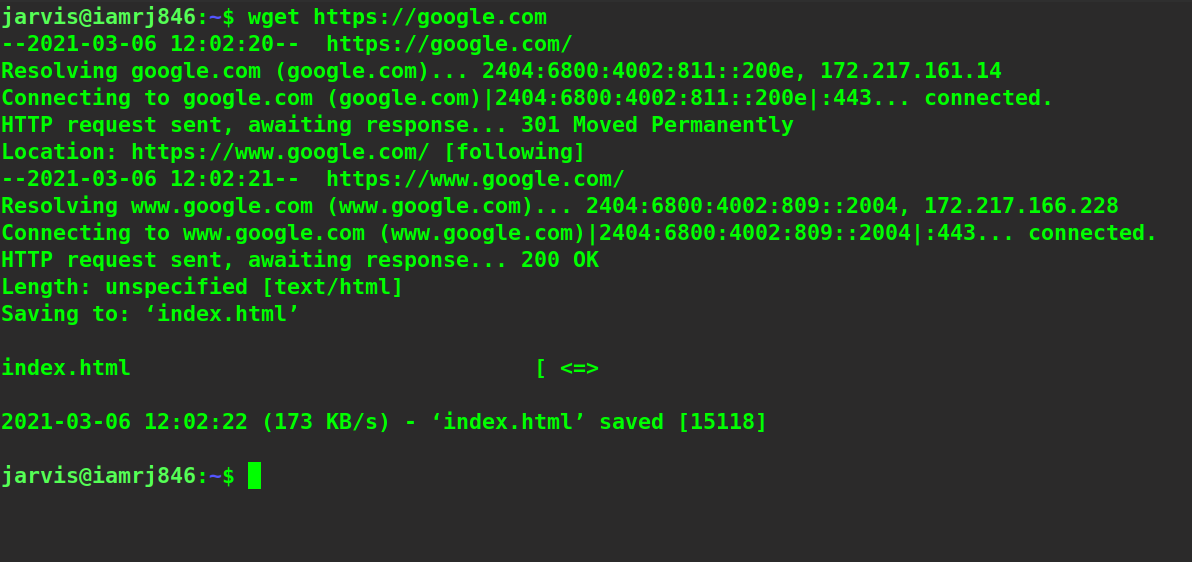
It can be used as an alternative to the curl command and can be used to download a webpage but it always displays the entire request-response cycle while doing so. It will download the webpage in the directory that is set currently.
$ wget https://google.com
19. Man
Linux offers tons of packages with a plethora of functionalities and features and knowing them all is next to impossible. The man (manual) command will display all the related information for a package that you specify along with the command.
$ man apt
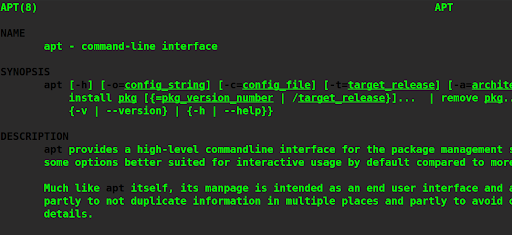 This command will show you all the relevant details related to the apt command which is a package manager for Debian-based Linux distros.
20. Uname
The Uname command will display information regarding the Linux system that is being used. This is useful when you are working in a network of systems and you want to find the details of your system in that network. The -a option stands for all which instructs the command to display all the relevant information.
$ uname -a

21. Whoami
The whoami command will return the username of the current user in the Linux system that is being used. This command is generally used if you are in a network of Linux machines and there is no generic name allocated to your system which is difficult to remember. Also, it can be used or piped along with other command to invoke important commands on the current user.
$ whoami

22. Hostname
In contrast to the whoami command, the hostname command returns the hostname of the Linux system. A Linux system in a network is identified by it’s hostname and inside the Linux system, users are uniquely identified by their usernames and UIDs. You can identify your Linux system in a network using this command.
$ hostname

23. Grep
The grep command is used to find a match for a substring in a text file or any content output. Mostly, this command is used with the pipe operator along with any command that produces a text output such as cat, less, etc.
$ cat ~/sample/file1.txt | grep “hello”

24. Head
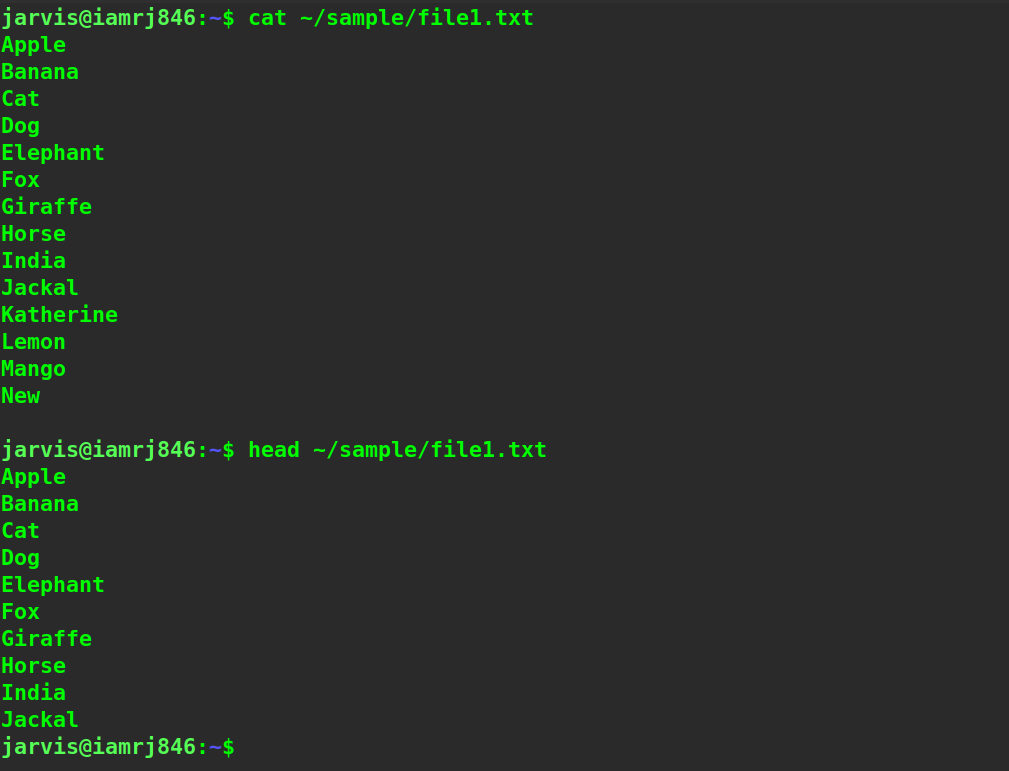
If a file contains a large number of lines and you just want a preview of the file, you can use the head command to print just the first 10 lines from that large file. Sometimes, if you want to just know what’s inside a file instead of printing the entire content, it’s wise to use a head command instead of a cat or less command to print the entire file. This helps you to better manage the file and understand the content. By default, it prints only the top 10 lines, but you can change it by specifying the number of lines you want to print using -n option.
$ head ~/sample/file1.txt
25. Tail
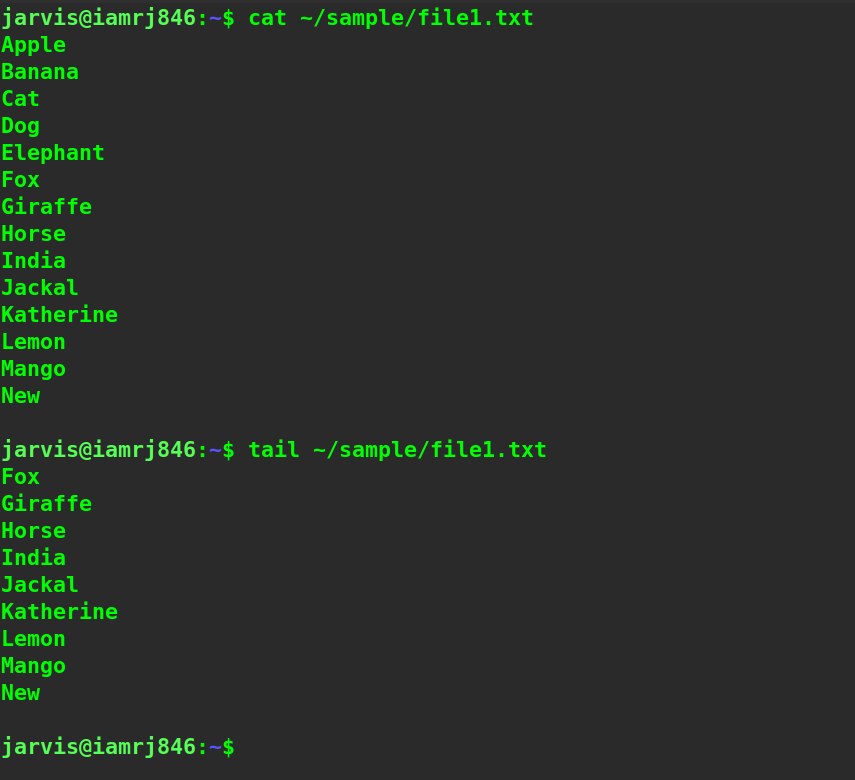
In contrast to the head command discussed above, the tail command is used to print just the last 10 lines from a large file. Tail command also helps you choose the number of lines at the end using -n flag. Please note that for both the head and tail commands, the lines include simple blank lines as well. The tail command also provides you -f flag which is helpful to monitor changes in a growing file. This flag is often used with log files to monitor the running jobs which are continuously writing the application state to the logs.
$ tail ~/sample/file1.txt
26. Tar
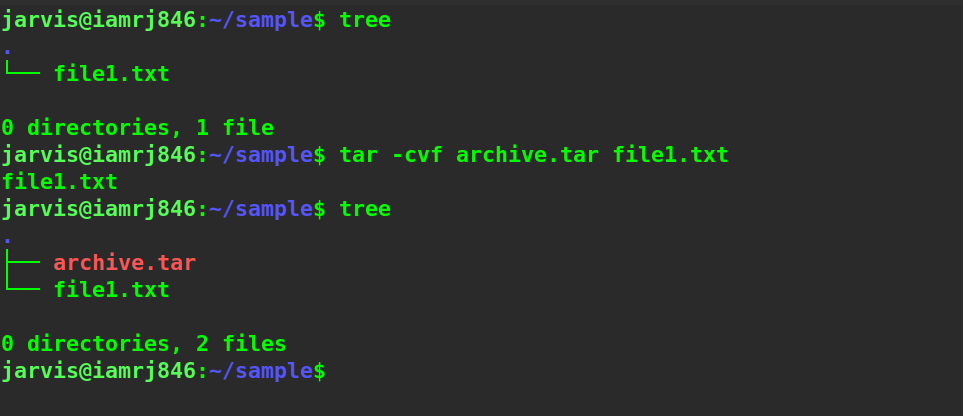
We can use the tar command if we want to create or extract tar files in Linux. It uses the -c flag if we want to create a tar file for a directory or a file and use the -x option to extract tar files. Please note that you can also specify the compression technique that you want to use. By default, it’s the gzip compression technique. You can use the bzip2 compression technique as well using the appropriate option. Let’s create a tar file.
$ tar -cvf <tar file name> <file names>
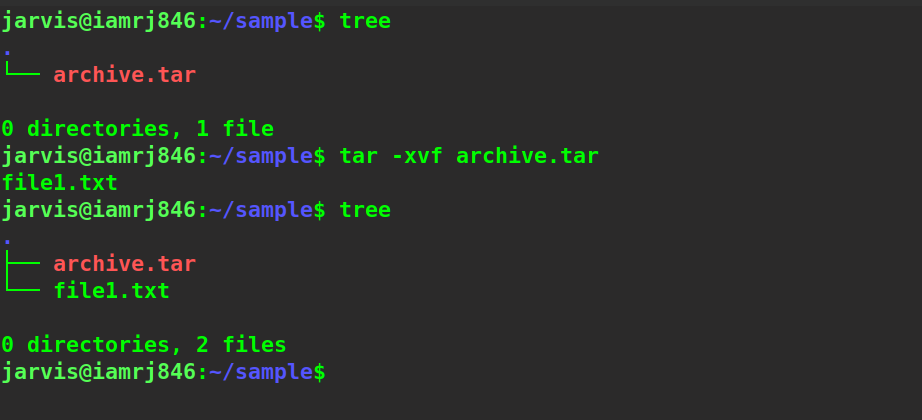
 To extract the same tar file, we can use the
-x
option.
$ tar -xvf archive.tar
27. Zip
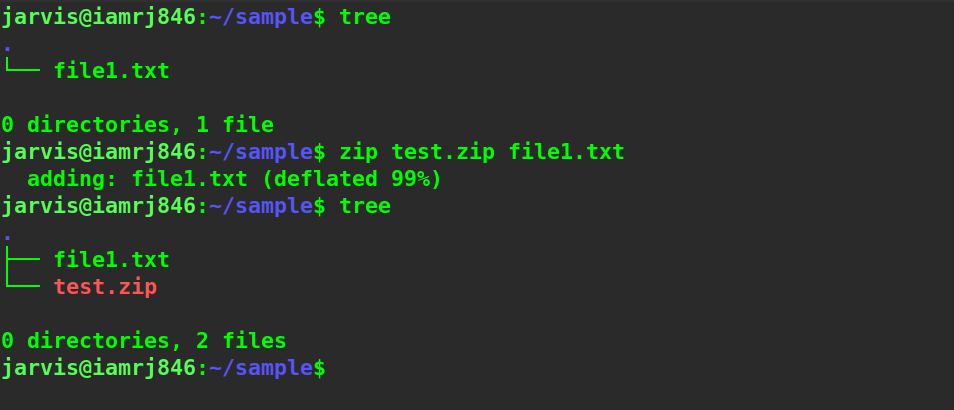
We can use the zip command in Linux to create zip files for a single file or more than one file simultaneously. Zip files are used to compress files or directories that are large in size so that it becomes easier to share and store them. The extension of the new file is .zip and you can use the unzip command to extract the compressed files.
$ zip test.zip file1.txt
28. Unzip
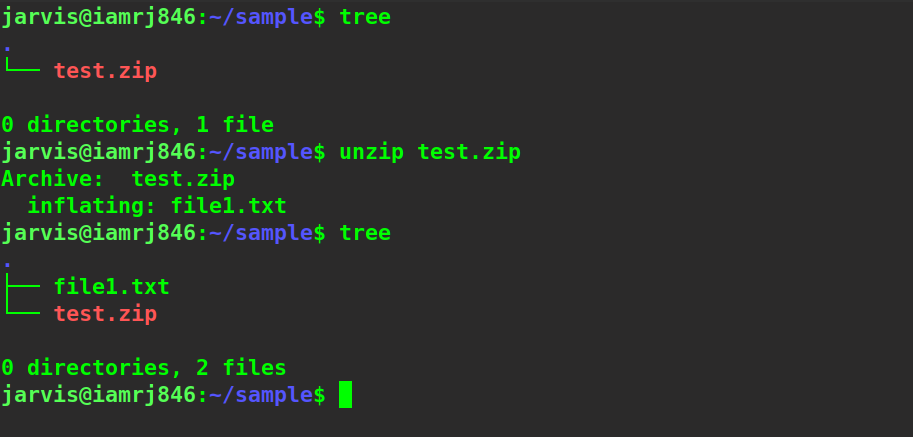
To unzip a zipped file, we can use the unzip command. The unzip command is simple, you just need to specify the name of the zipped file. By default, it will extract the files in the current directory. You can either move to another directory to extract files there or use the -d option to specify the destination directory’s path.
$ unzip test.zip
29. Df
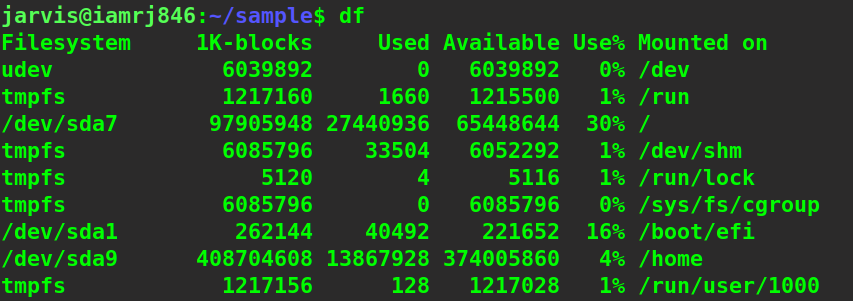
You can use the df (free disk) command to find out the used and available spaces of the different file systems in your Linux system. Please note that it does not display the file sizes or directory sizes as such. It only displays the total disk spaces for all the disks and filesystems that are mounted on your machine as well as the used space and the percentage of used space. It shows the size in terms of 1K blocks.
$ df
30. Du
Unlike the Df command, the Du (Disk usage) command displays the size of directories and files in the Linux system.
$ du

31. find
You can use this command to find files based on type, name, or any other parameter that it supports. For example, you can use a regular expression to specify patterns in the names of files that you are looking for or you can specify the type of file as well.
$ find ~/sample/ *.txt
 In the above example, we are looking for all the text files inside the sample directory.
32. Free
You can use the free command to display the memory statistics of your Linux machine. It will display parameters such as total RAM, free, and used up space, cache size, etc. Here, we have used the - h option along with the free command to pretty-print the output in a human-readable format. If we don’t use the -h option, the output is pretty messy and you won’t be able to infer the memory usage. Also, this command will display information related to the swap memory that has been allocated and in use. This will help you to determine how much swap should you allocate to the system.
$ free -h

33. Groups
To find out all the groups in the system, you can use this command. You can also find out the name of the groups that a user is currently a member of. Linux system creates groups of members that has similar permissions to files in Linux. Whenever we create a new user, a group with the same username is created. Also, whenever we create a new file, the owner becomes the user and a group with the same name as the owner name is allocated to the file.
$ groups
$ groups jarvis

34. History
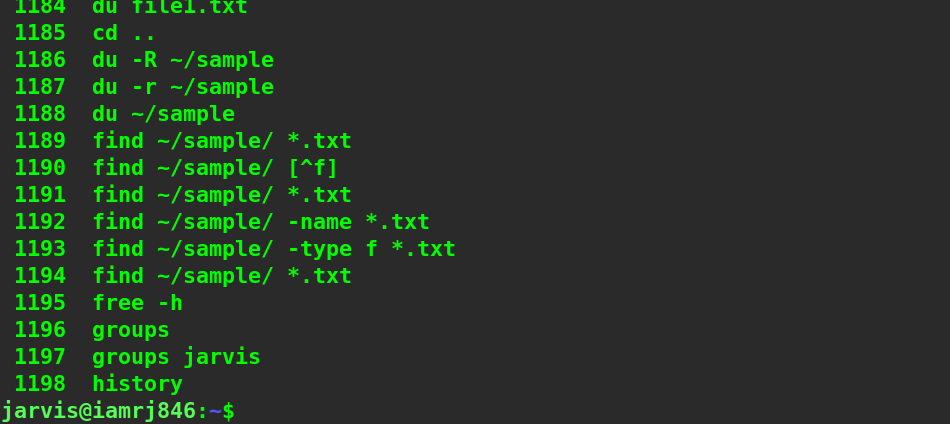
We can use the history command to display a list of all the previous commands that we have executed inside the terminal. This command is particularly useful if you want to find out what commands you used earlier and simply press the upper arrow key inside the terminal the specified number of times to get hold of that command instead of just typing it.
$ history
35. Kill
We can use this command to kill a process. You can specify the process ID to kill that particular process. To get the process ID, we can use the top command. This is very useful when you want to remove processes that are taking up a lot of space and CPU or memory usage. You can check the process name in the command parameter and remove them by specifying the process ID.

$ kill 1207043
 This will close all the firefox tabs currently running.
36. Passwd
You can use this command to change the password for a user. Please note that you need to have access to sudo privileges to execute this command. Also, changing a password can be sensitive. So, please make sure that you invoke this command on the right user.
$ sudo passwd user

37. Ping
This command is used to send request packets to an IP address to check whether the server in that IP is running actively or not. This is useful when you are in a network of machines and you want to find out the nodes that are not running.
$ ping <ip or url>

38. Shutdown
This command can be used to shut the PC down. You can use several options such as now , -c (cancel), timestamp, etc. You can either shut your Linux system down at the very execution of the command or specify a time when you want the system to automatically shut down or you can cancel a scheduled shut down of the Linux system using the -c option.
$ shutdown
$ shutdown now
$ shutdown 23:00
39. W
You can use the w command to display a list of all the users who are currently logged in to your Linux server. This command is particularly helpful if you want to find the CPU usage and what Linux distro and sessions are being used by the different users who are accessing your Linux system whether through the same physical machine or through remote access via SSH.
$ w

40. Diff
You can use this command to check if the two files are similar or not. This command will only return whether the two mentioned files contains data or content that are exactly similar to each other or not. It doesn’t display the line number or the lines that actually differ.
$ diff <first file> <second file>
 Here, you can see that the command has told us that the two files mentioned differ.
41. Cmp
This command will tell you the line number and bytes where the two files differ. The cmp command searches or compares byte-by-byte hence, it can return the byte number where the lines begin to differ. It will also return the line number where the difference occurs. Please note that a separate line is denoted only by a newline character and not what you see inside the terminal.
$ cmp file1.txt file2.txt

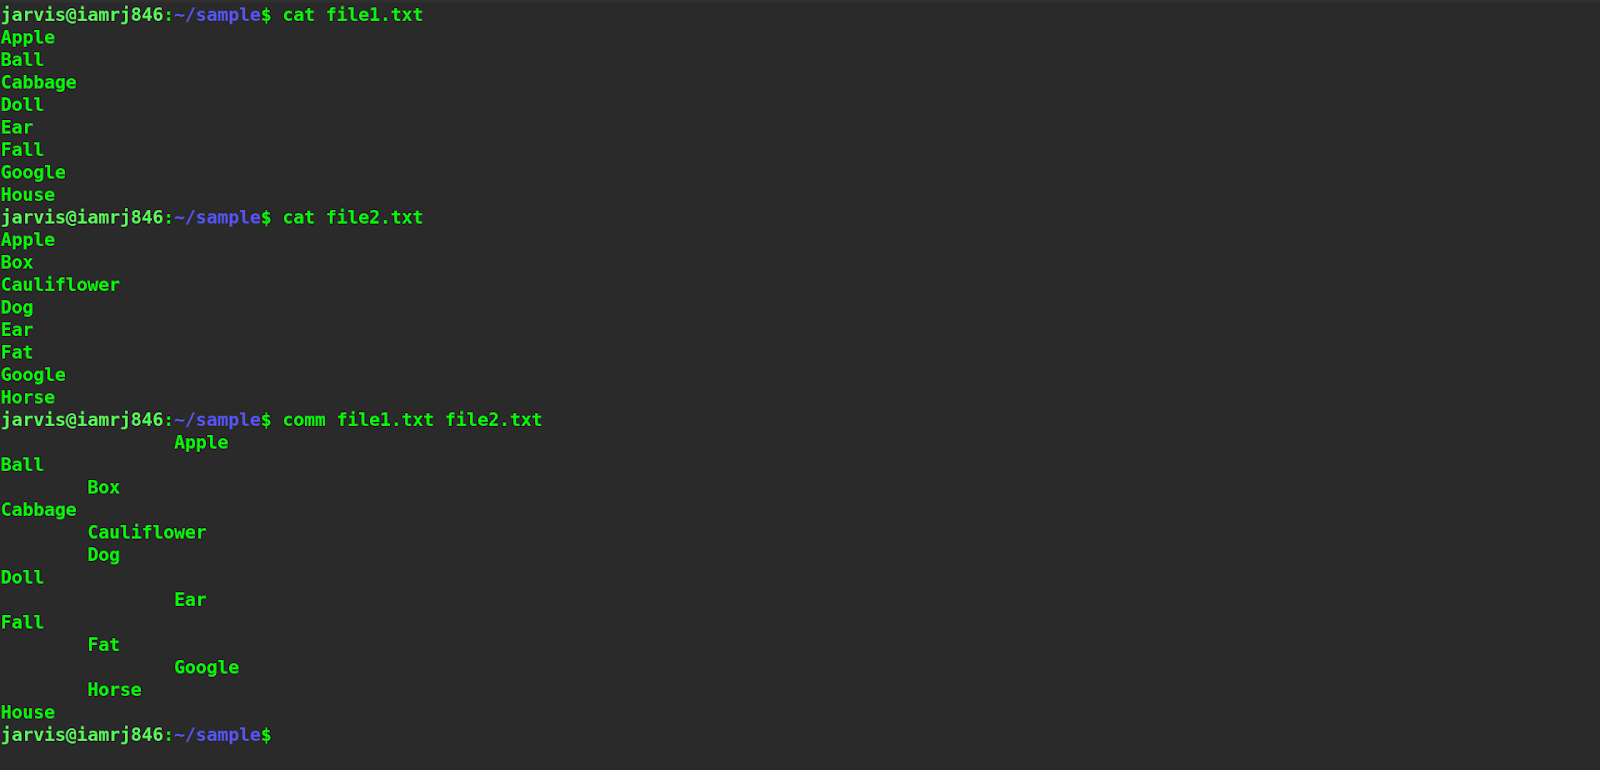
42. Comm
In contrast to the cmp command which only displays the line numbers, the comm command will print the actual lines of file2 that differ from file1. If you want to see all the lines that actually differ, this command will show you a line-by-line comparison of the differing lines in the two files.
$ comm file1.txt file2.txt
43. Sort
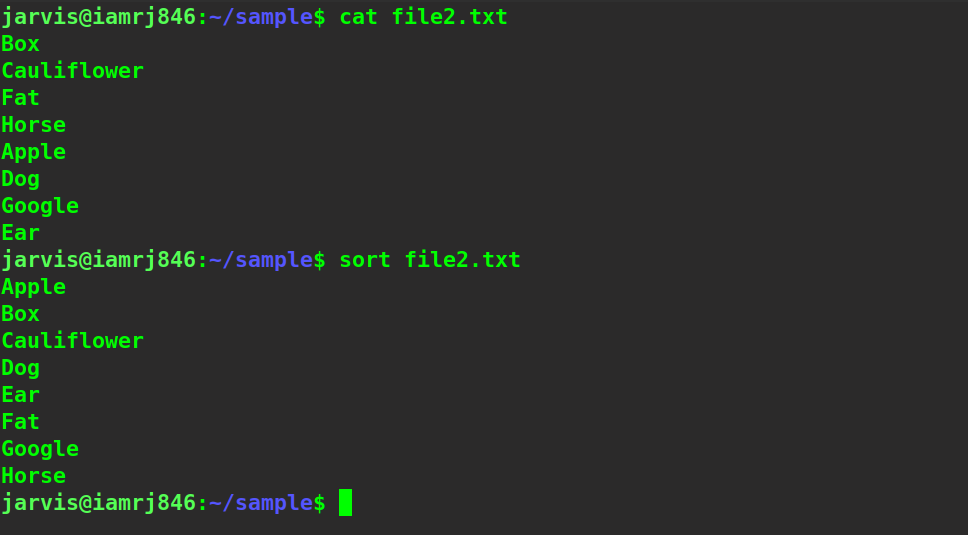
This command will help you to print the contents of a file in sorted order. You can print the output in reverse order as well. You can also use this command along with a pipe operator with other commands.
$ sort filename
44. ifconfig
If you are a part of a Linux network, you might find this command useful. You can use this command to enlist network interfaces with details such as MAC, IP addresses, etc. It will list the details of all the IP addresses along with their broadcast information.
$ ifconfig

45. Cal
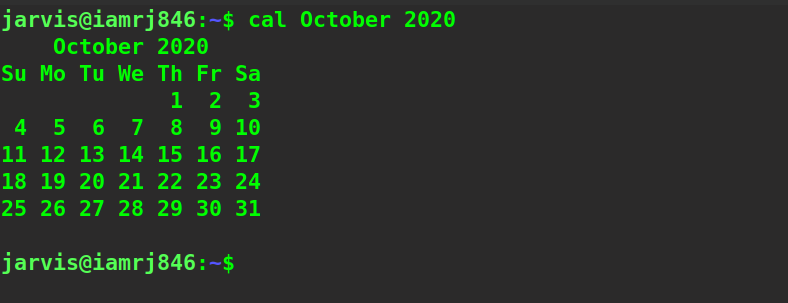
You can display a calendar in the terminal using this command. You can also print the calendar of a particular month or a year. Although, it’s not wise to open a terminal and print calendars or months, since, you can easily use a graphical calendar to do so. However, it’s always fun to know the power of a command-line.
$ cal$ cal October 2020
46. Whereis
If you want to find out the location of a command that you use, you can do so using the whereis command. By location of a command, we mean the installation directory of the application or the program that uses this command. For example, in the below command, we have used the whereis command along with the sudo sub-command to find out the installation directory of the sudo package inside the Linux System.
$ whereis sudo

47. Whatis
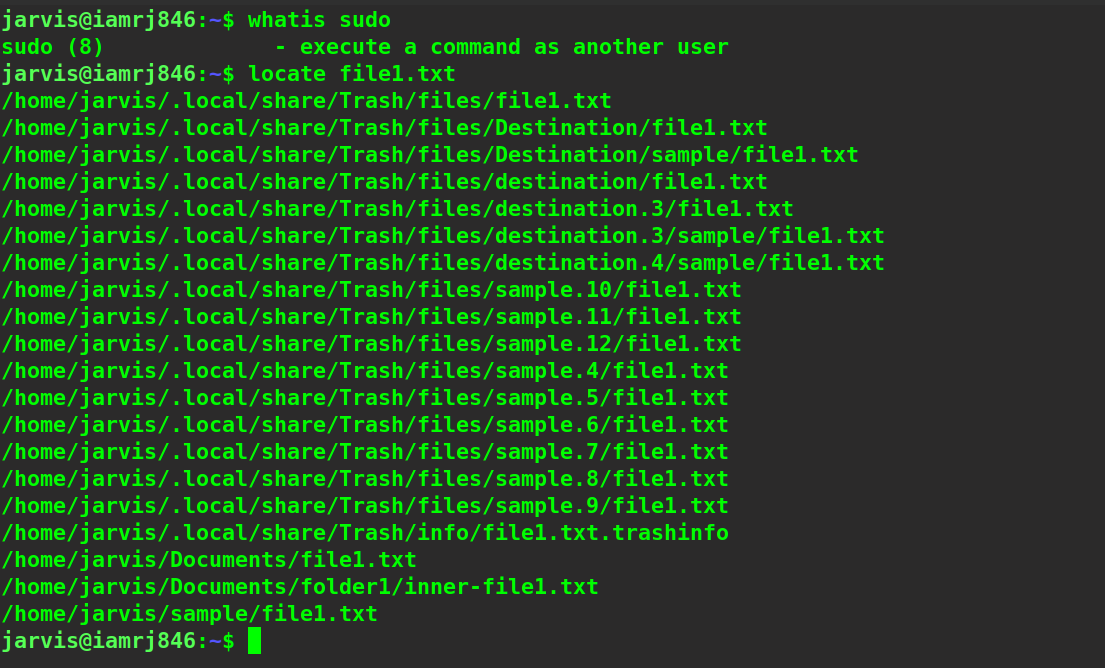
You can use this command to find out what a particular command exactly does in Linux. You can specify any command along with the whatis command and it will generate a simple description of the actual usage of the command. To find more about this command, you can always use the --help option.
$ whatis sudo

48. Locate
You can use this command to find out the location of all the files that has a name similar to the one you specified in the command.
$ locate file1.txt
49. Ps
This command will list all the running processes in your system. The ps command will display information related to actively running processes such as process ID, timestamp, the command used to run the process, TTY, etc. This is where useful if you want to find out which process has been running for long and is useless so that you can remove it from your memory.
$ ps

50. Nautilus
If you have a Nautilus file manager and you want to open a directory using a command line, you can use this command. You can also combine the nautilus commands with key combinations so that when you press that particular key combination, the directory opens automatically.
$ nautilus ~/sample/

Conclusion
There are many commands in Linux but here we have only covered the most frequently-used basic commands. As you will use Linux and dive deep into its commands, you will get acquainted with many new ones. Moreover, you will understand these commands better. We hope that this article covers all the basic commands that will get you started with the Linux Command Line Interface (CLI).
People are also reading:


Leave a Comment on this Post